Using air dry clay for mini cakes
For years I was wary about using polymer clays as I have never been able to bake them correctly, and very often ended burning them. I tried Modena air dry clay, made by a Japanese company called Padico, and have found all sorts of uses for it. There are of course different air dry clays out there and they are all interesting and fun to try, but their properties vary. For example, some won’t hold fine detail and others take longer to dry so stay workable longer. Plus there are myriad recipes for making your own. For cakes, I think Modena is a very good option although it does tend to dry fairly quickly. It is a good price and is used frequently by many Japanese food and flower artists.
Some tips when working with Modena:
It’s a type of resin clay. You may see this term used in tutorials.
It can dry quickly so keep clay wrapped or sealed in a bag when not immediately working with it. You can add a little water to help keep it workable.
It colours easily with acrylic paints or chalk pastels but tends to dry darker than it appears wet, so if colour is important do a test piece first to check how it dries.
The white clay, if used as is, will dry slightly translucent, so adding a little white paint will increase opacity and whiteness. Use a really good quality artist white paint as it will be much more opaque than a cheaper craft brand.
Make sure your hands and tools are clean.
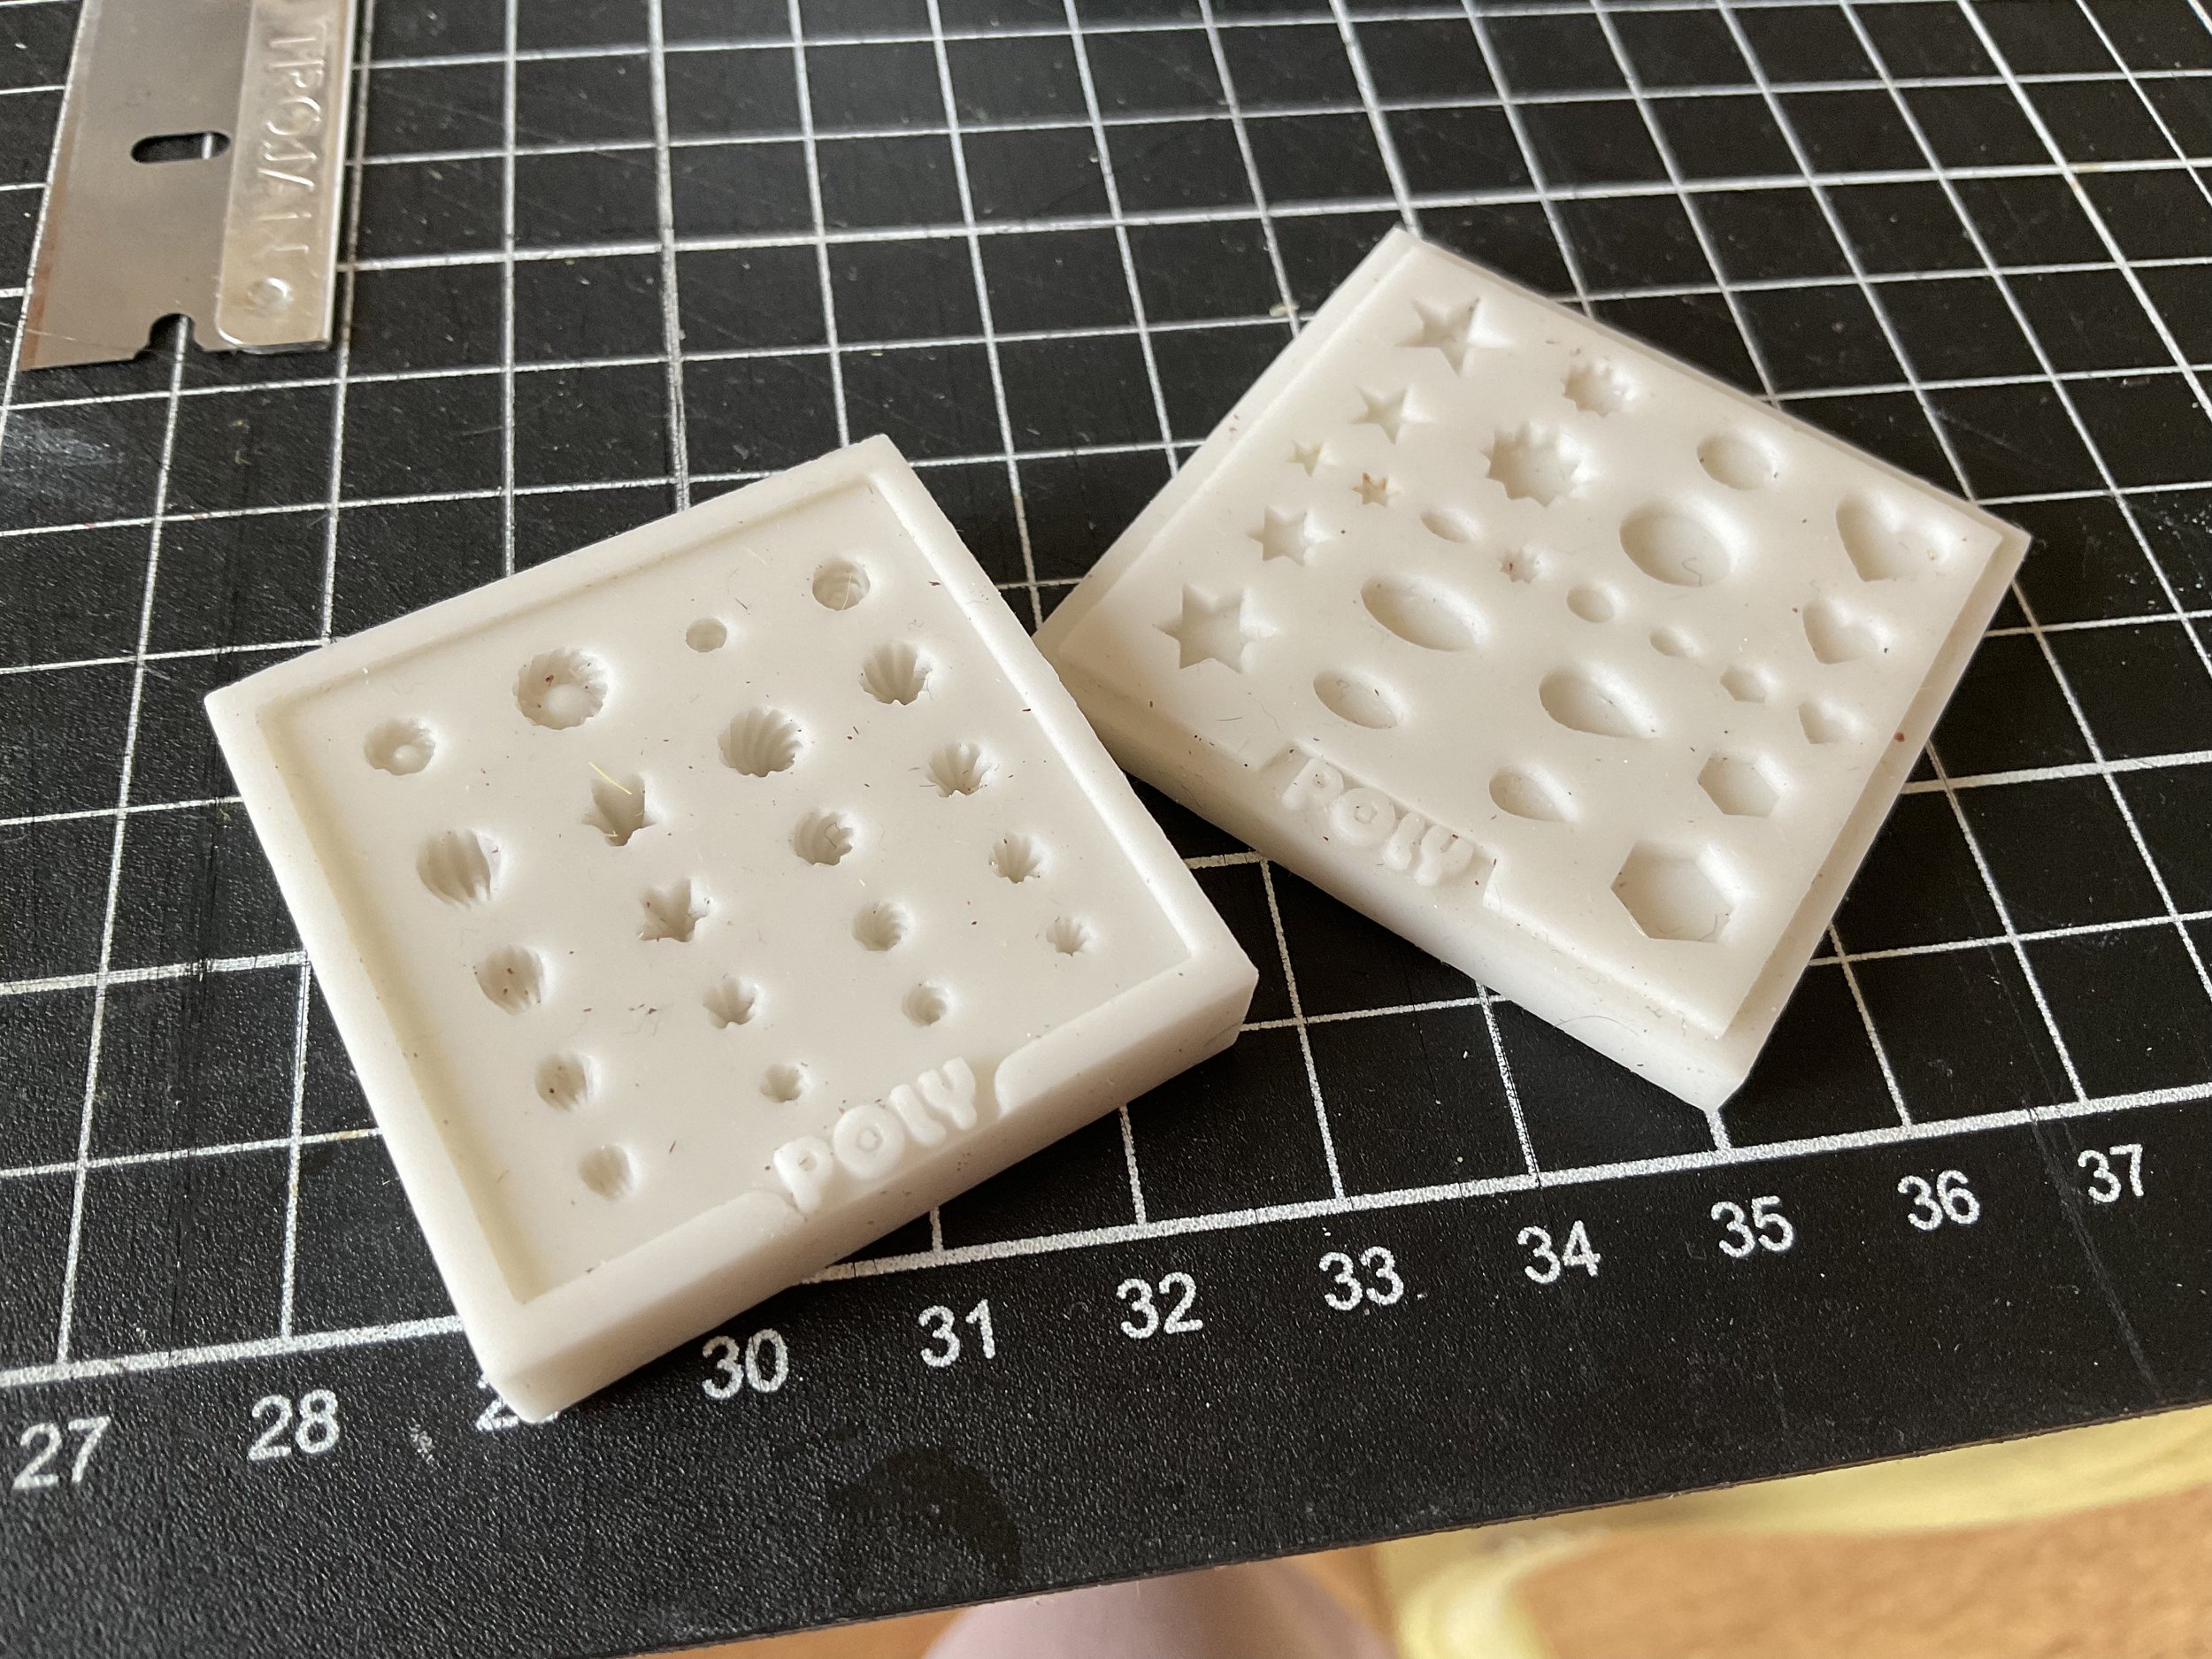
You can use it in silicone moulds, same as polymer clay. With a dry brush, dust moulds with a little talc before pushing your clay into the mould. It should pop right out. For tiny pieces, you don’t need talc.
I recommend making things in stages, allowing the clay to dry in between. I use a little PVA/tacky type glue to attach wet clay pieces to the dry.
Modena dries flexible. This is part of why it is used for mini flowers, so fine pieces are less likely to break, but does mean it is difficult to sand.
My clay’s dried out a bit so I made little bags and cushions (things that are bigger and don’t require fine detail) from the drier bits.
Modena is really good for making tiny detail pieces like flowers. You can make very thin petals or leaves.
Tools are the same as for polymer clay.
To make it easier to hold dry cake pieces to decorate, I use a little double-sided tape to hold them to my work surface or an upturned cup.
The clay will shrink as it dries.
You can’t bake it, so if you mix air dry and polymer clay parts on the one piece, you will need to make sure all your polymer clay parts are already baked.
You can make cakes using moulds as per my polymer clay cake tutorial, dusting your cakes with soft pastels to add colour, and allowing to dry.
You can make mini cakes in the same manner as the polymer clay ones, but again, try making one piece at a time due to the clay’s quick drying time. It can help to keep a damp cloth handy and placing it over wet pieces that need further work so you can still work on them later.
And if I haven’t already said this, I wear cheap 3x magnifying glasses.
This is a really good tutorial: https://www.youtube.com/watch?v=Xtdo_HqsuIk
I use these two moulds a lot. I can’t remember where I got them, but probably on Etsy. They were pricier but worth the investment if you want to make lots of quick, tiny decorations.
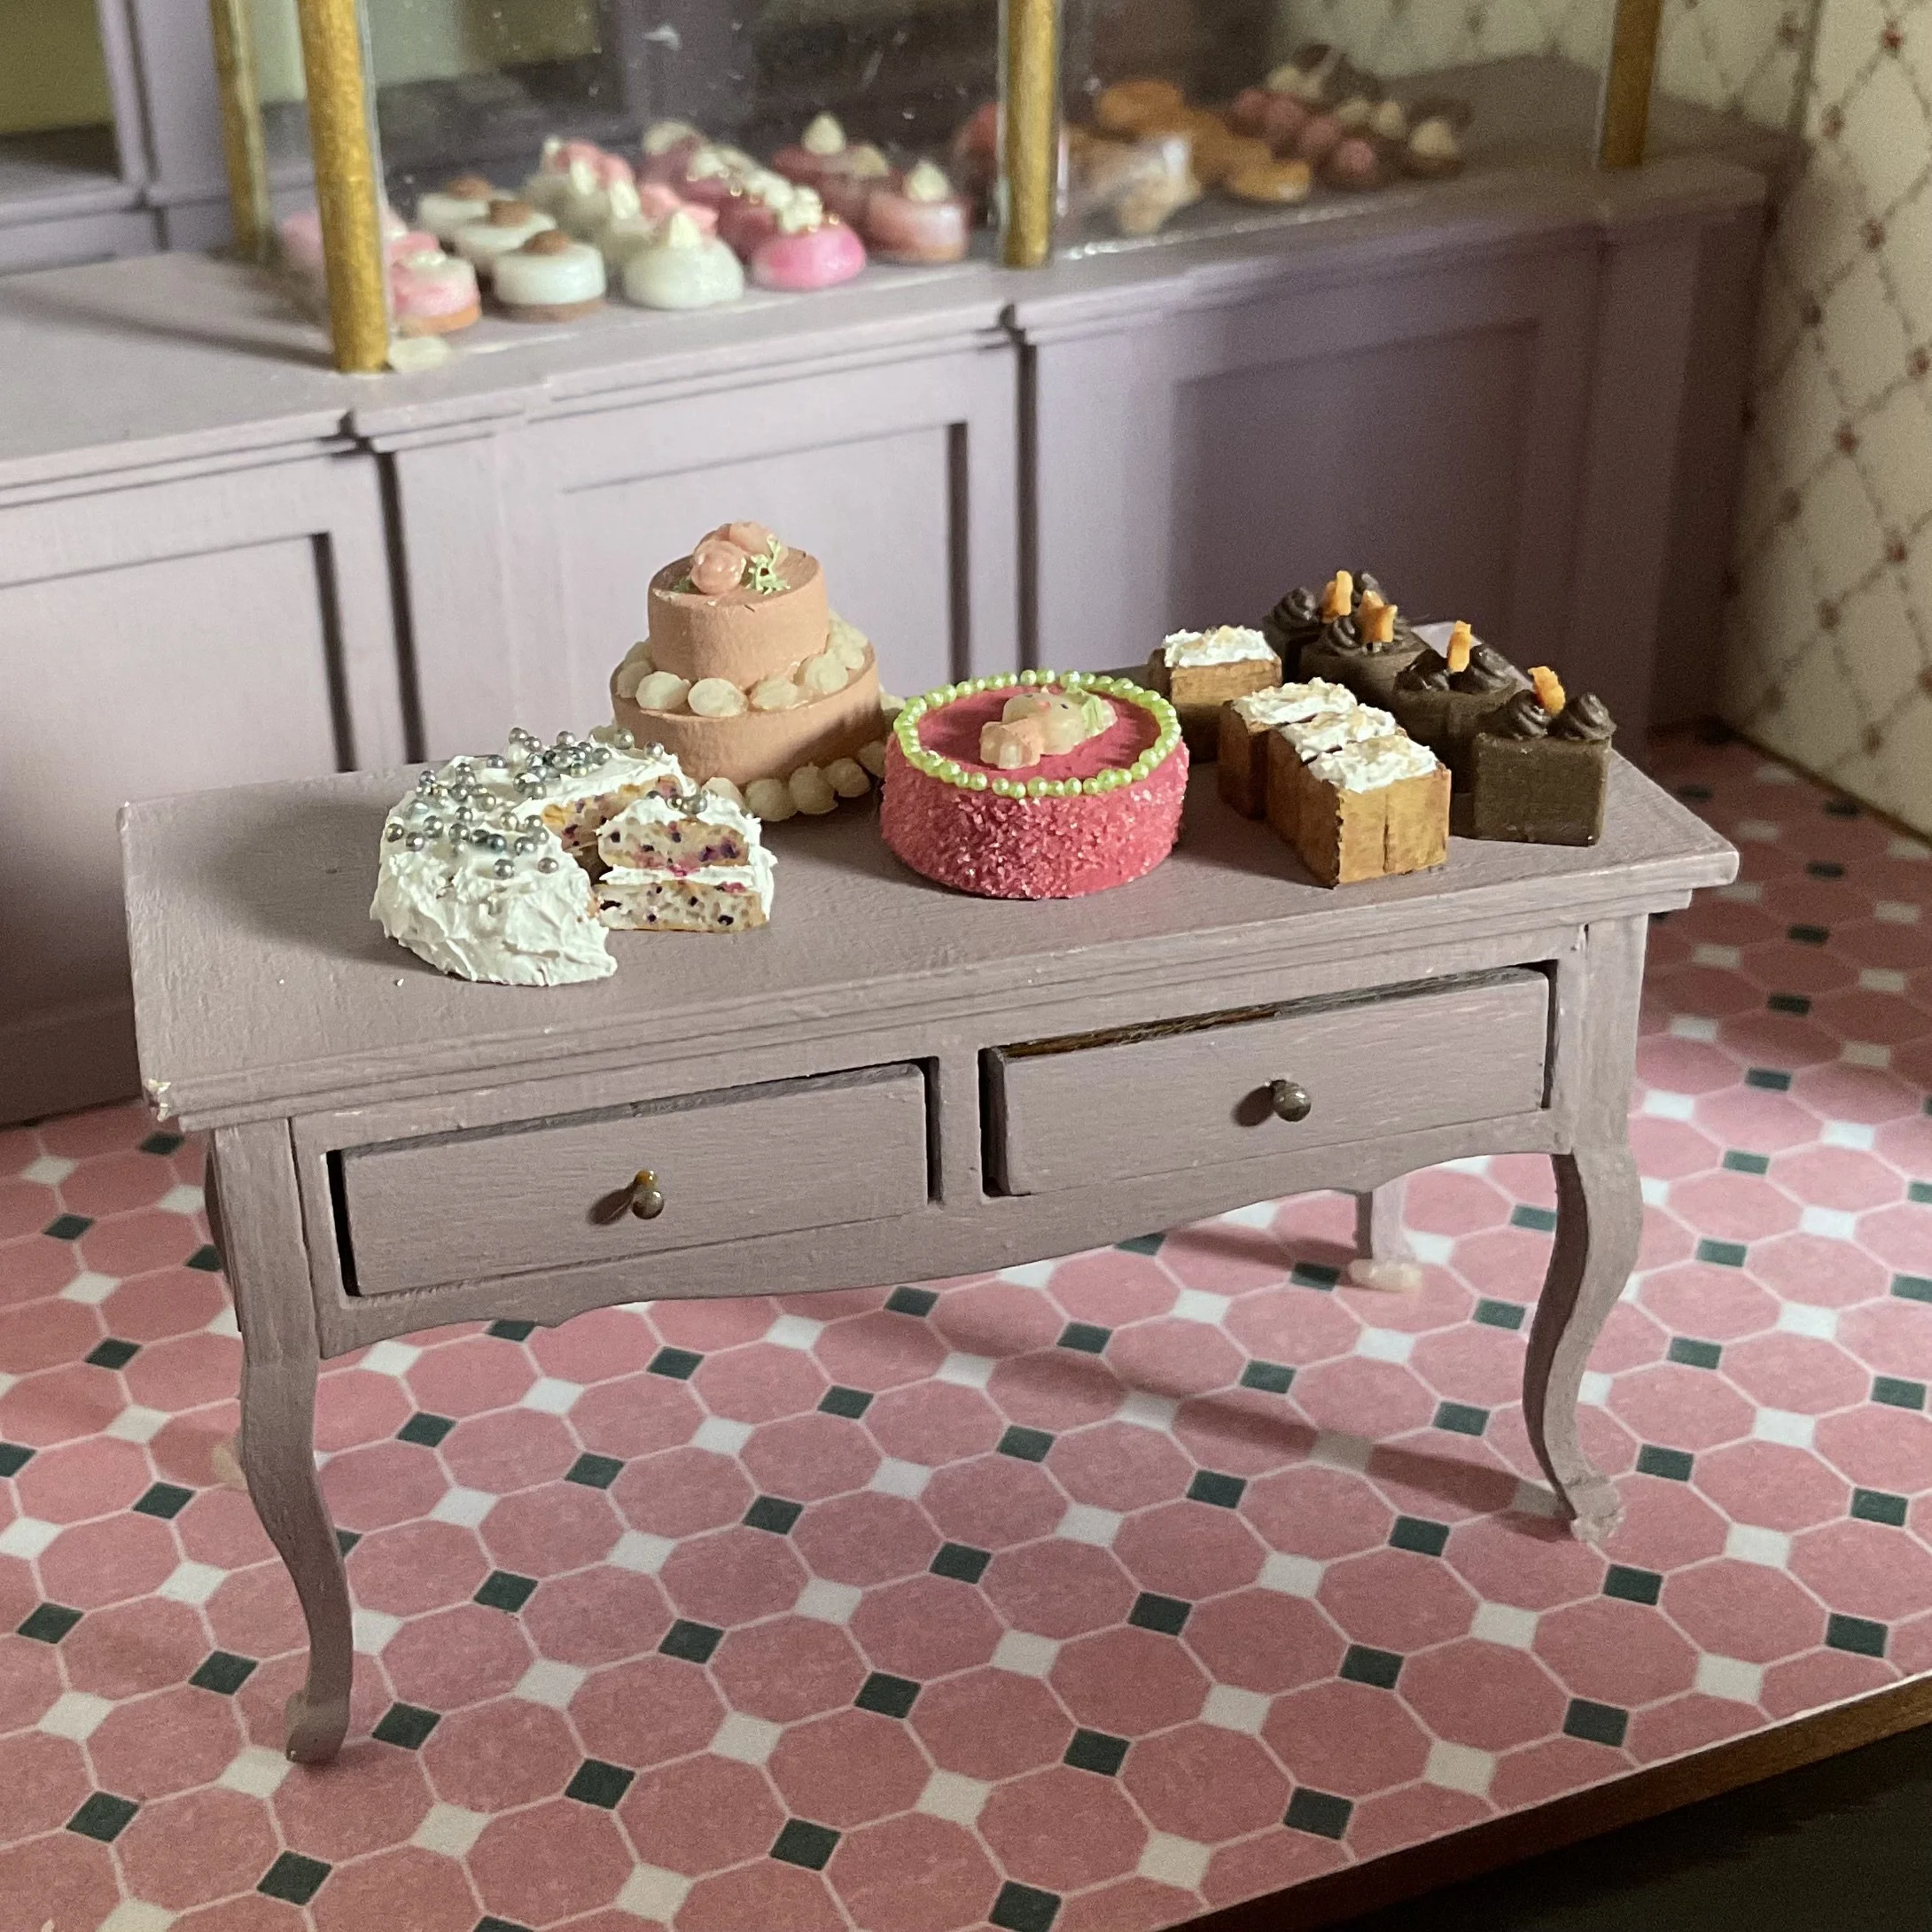
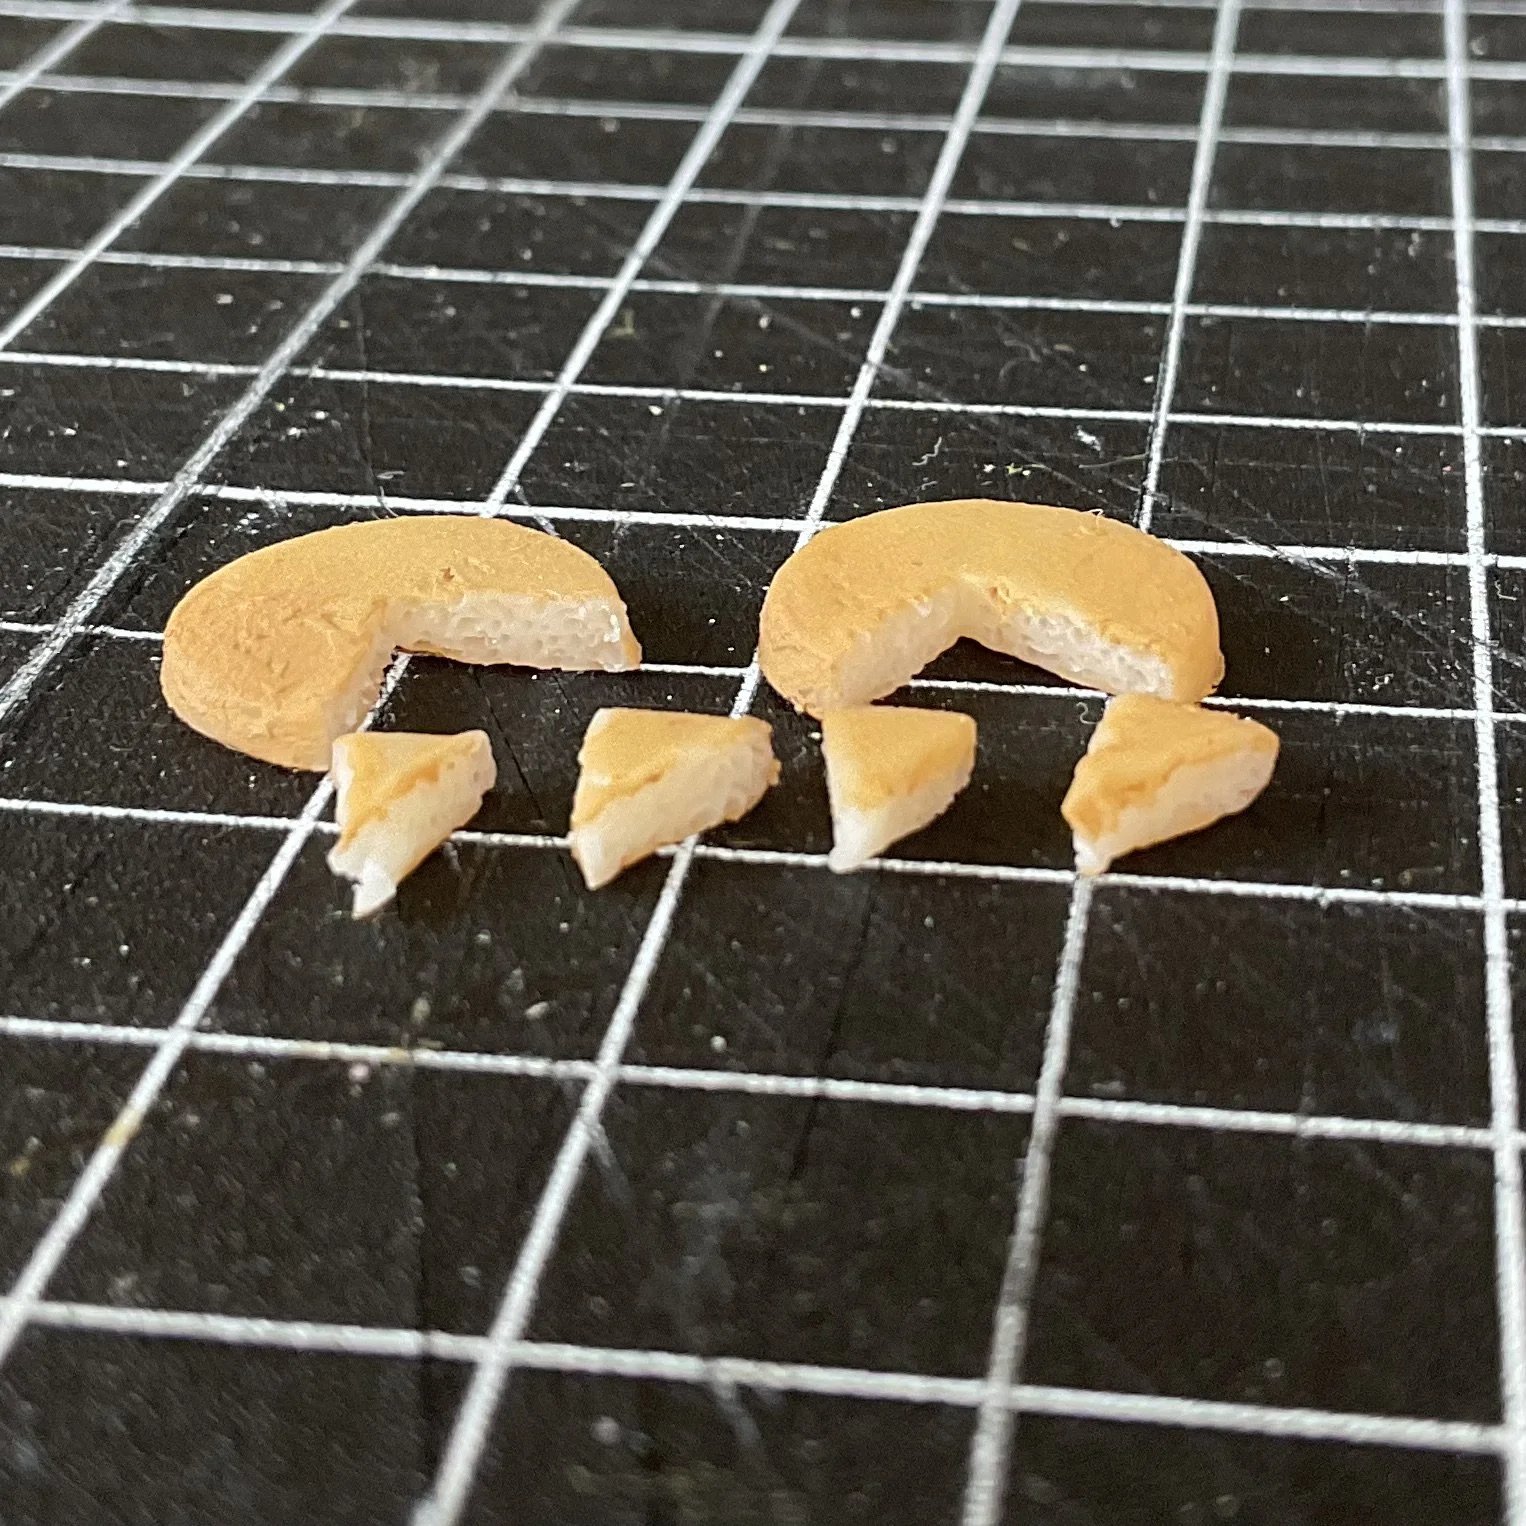
Blueberry cake:
Take white Modena and add a tiny bit of white and yellow paint to make a good cake colour. Roll out into a thin layer and cut your cake layers (2-3). Using a sharp single-sided razor blade, cut segments from the cake layers then stipple the cut cake surfaces with a needle tool.
Set aside to dry, then paint the uncut surfaces with a thin layer of watered down caramel coloured paint.
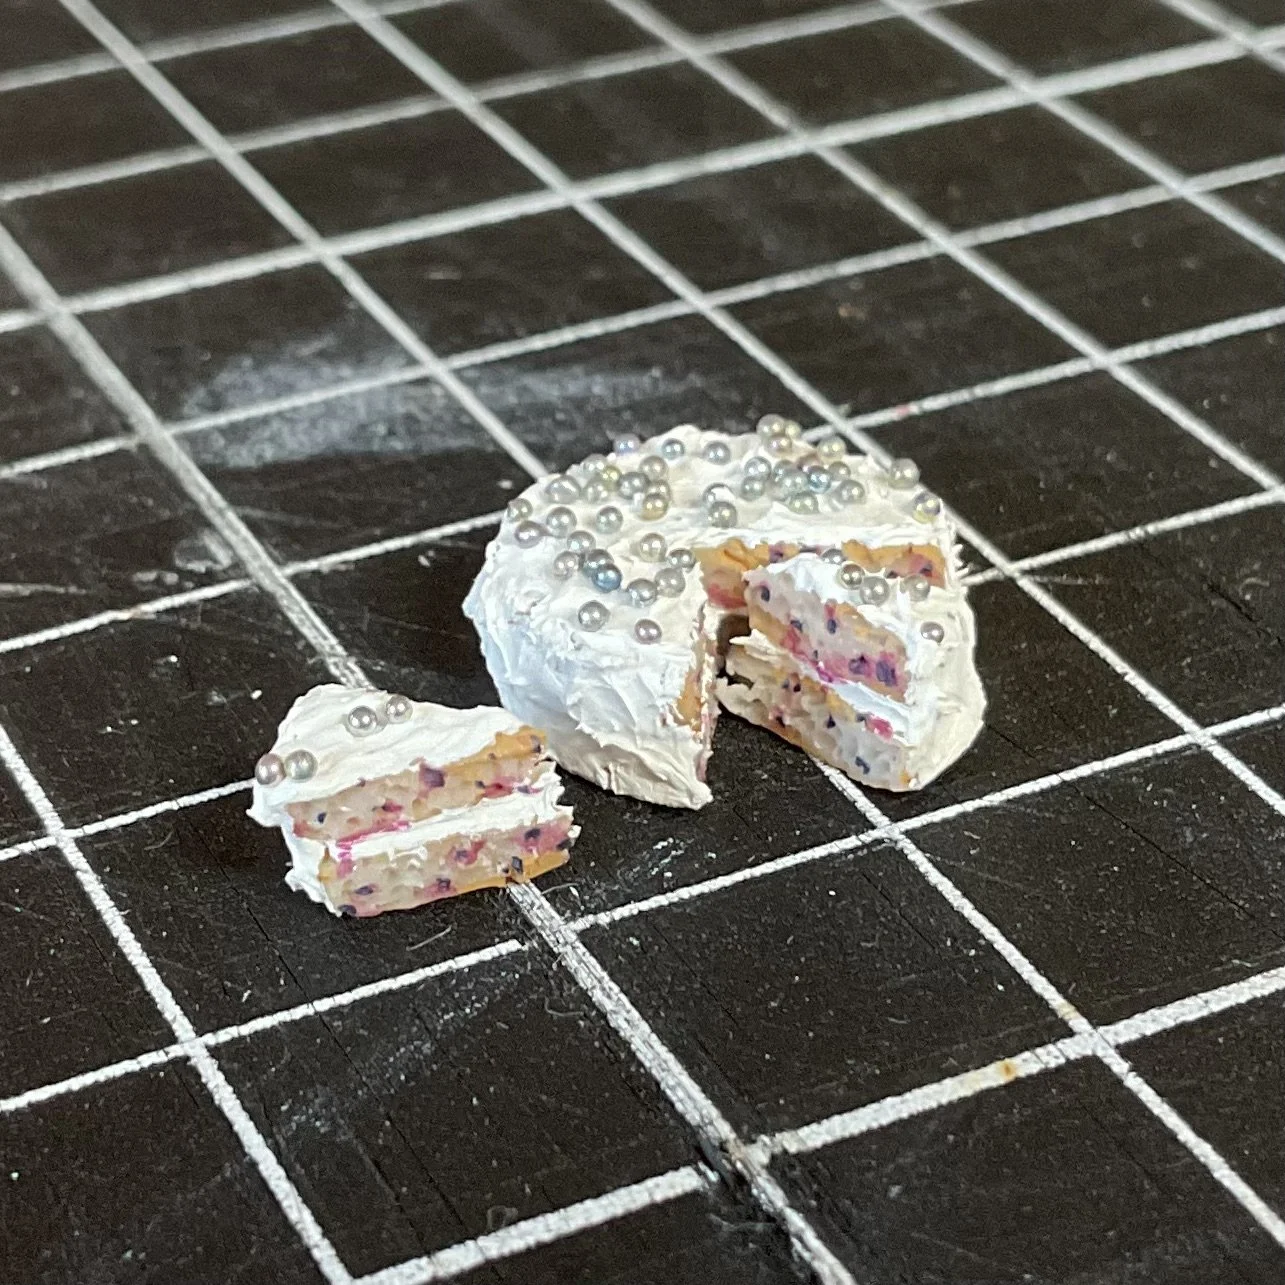
To assemble, use some texture paste as cream spread over one cake layer (I use a toothpick), then press next cake layer on top and make sure layers are even. Set aside to dry, then repeat with any remaining cake layers. Using a purple-blue paint, dot tiny blueberries on the cake. When dry, water down a magenta/purple-red paint and dab this over the blueberries.
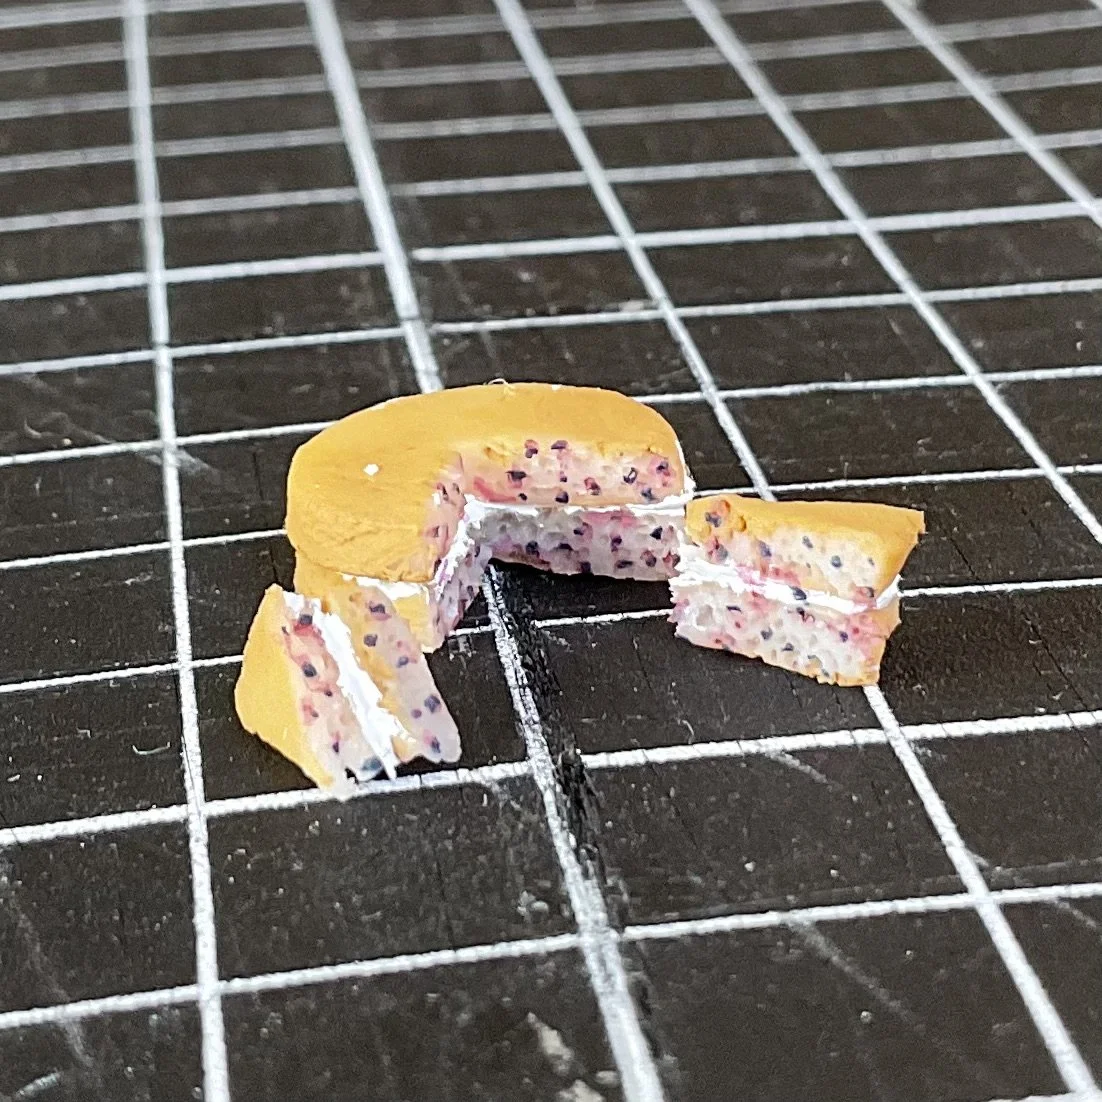
Spread more texture paste over the cake and down the sides if desired, and allow to dry. If you are placing decorations on top, arrange them on the wet texture paste and then allow to dry.
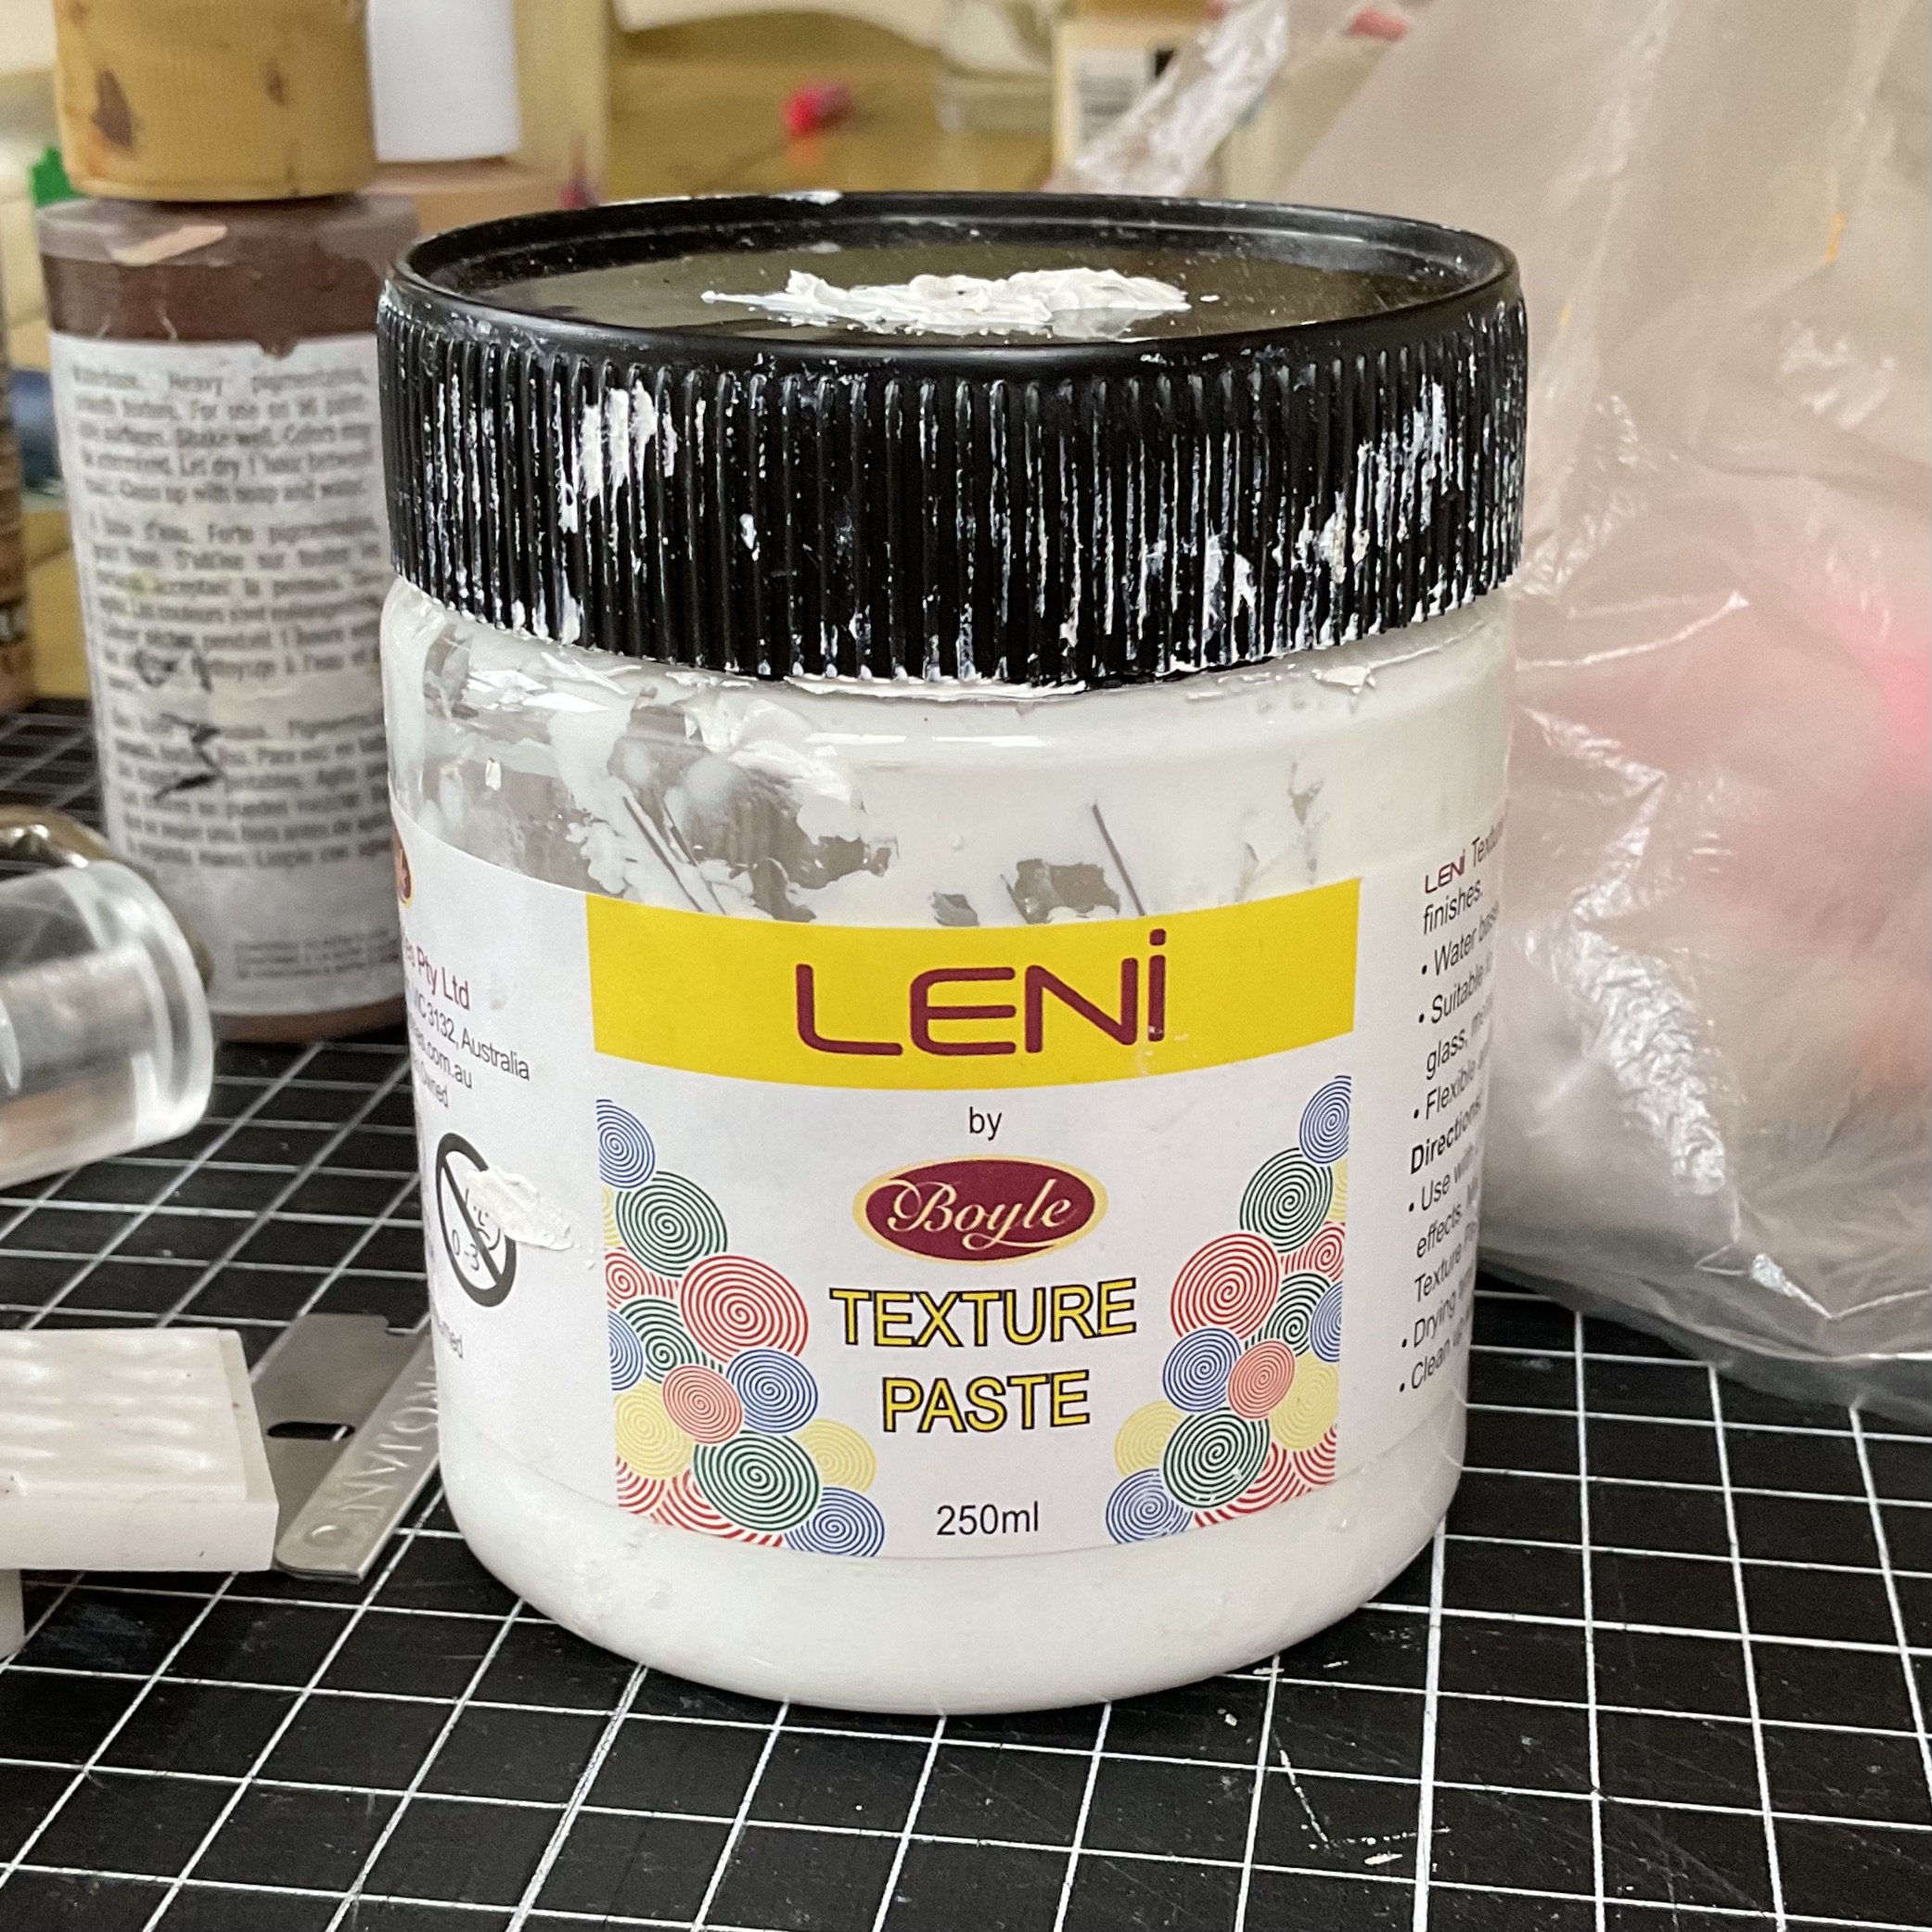
A note on texture paste: mine is a cheap brand purchased from Bunnings (hardware store) in their craft section. There are other cheap brands available, as well as expensive ones. The artist ones also come in a range of textures and finishes. You can colour it easily with soft pastels or a little paint. You can also use a little water to smooth over the surface as needed to reduce the texture.
Other cakes:
I have listed wood shapes in my store for you to use to make mini cakes. Below are some examples I have made.
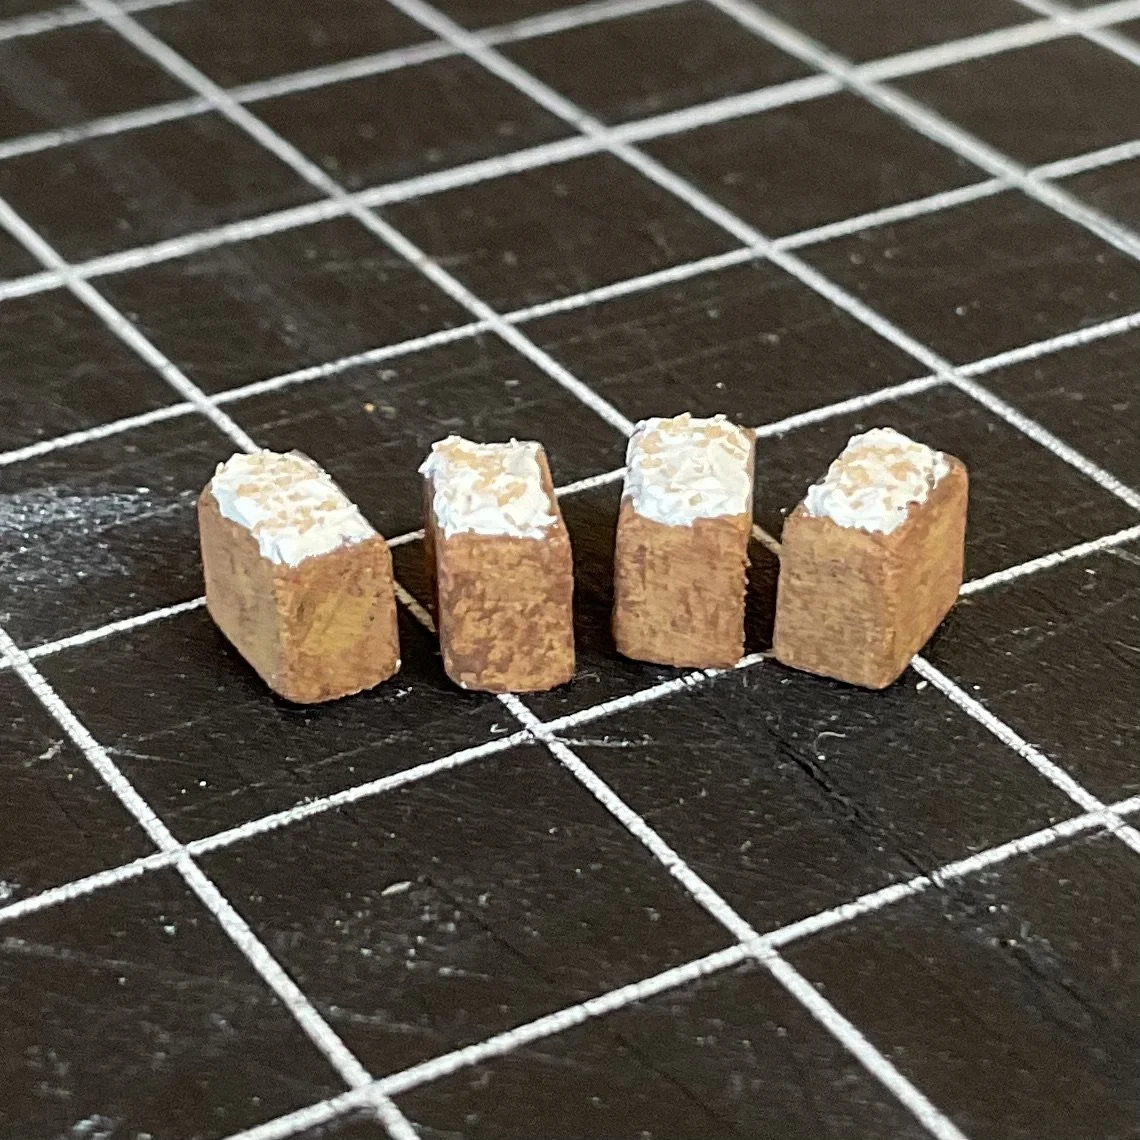
Individual carrot cakes:
Slightly sand edges of wood pieces if desired. Paint the wood in a warm golden mid-brown. You may need a few coats. I didn’t sand between coats as the wood fibres add a little cake-like texture.
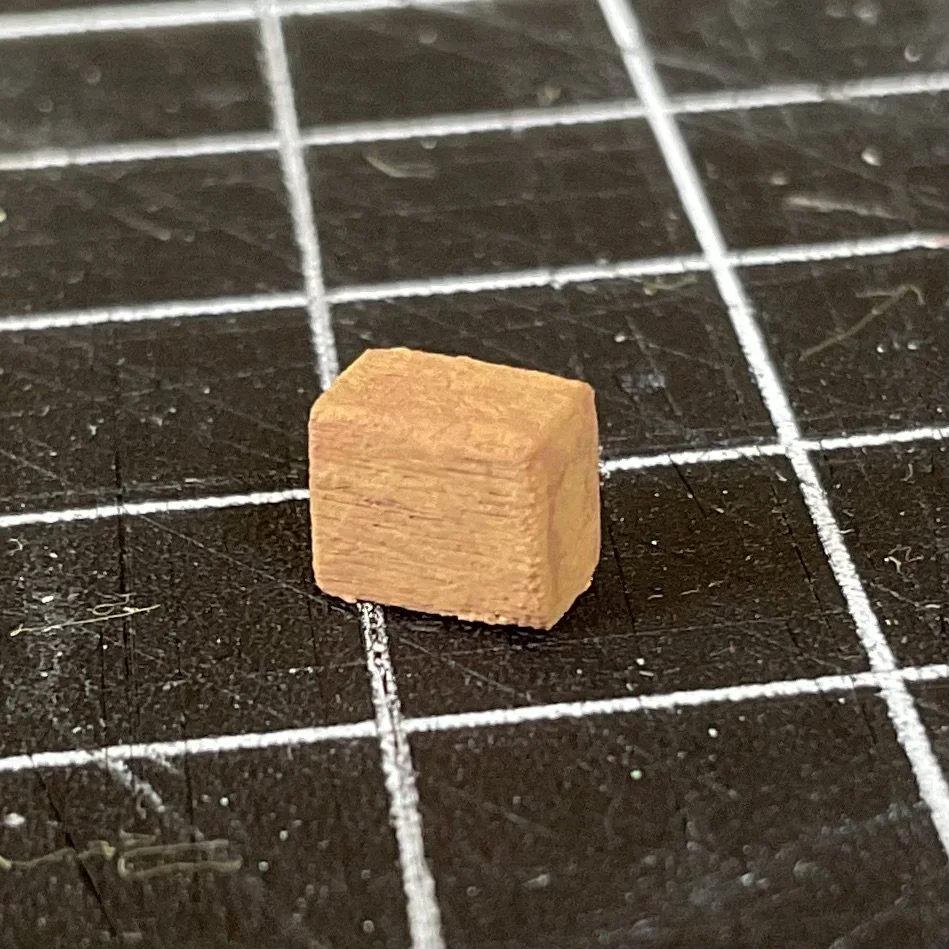
When done, stipple the cake with a tiny bit of a lighter golden brown, using a dry stiff-bristled brush. When dry, repeat with a darker brown, focusing on edges, bottom and top.
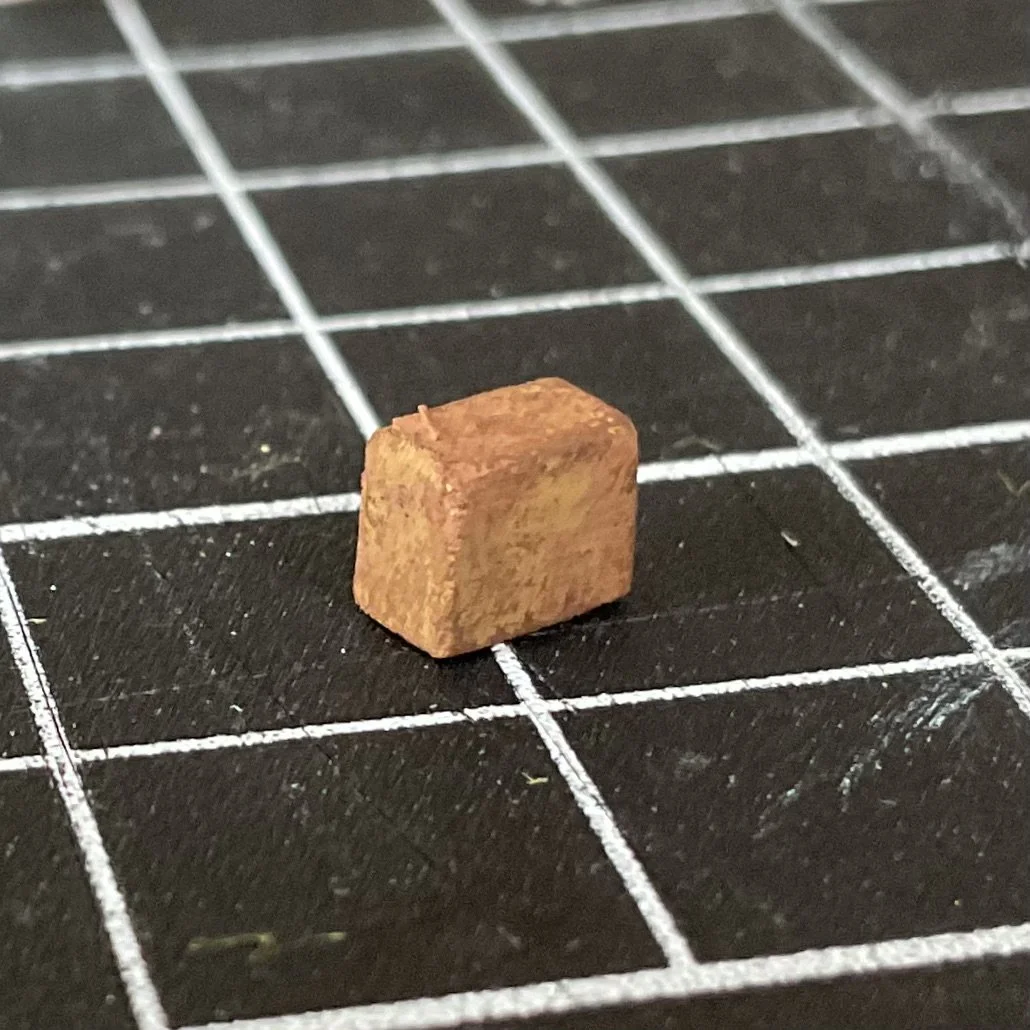
Apply some texture paste to the top of the cake with a toothpick and sprinkle a little craft sand on top (I am hoping this looks a little like crushed nuts!). Leave to dry.
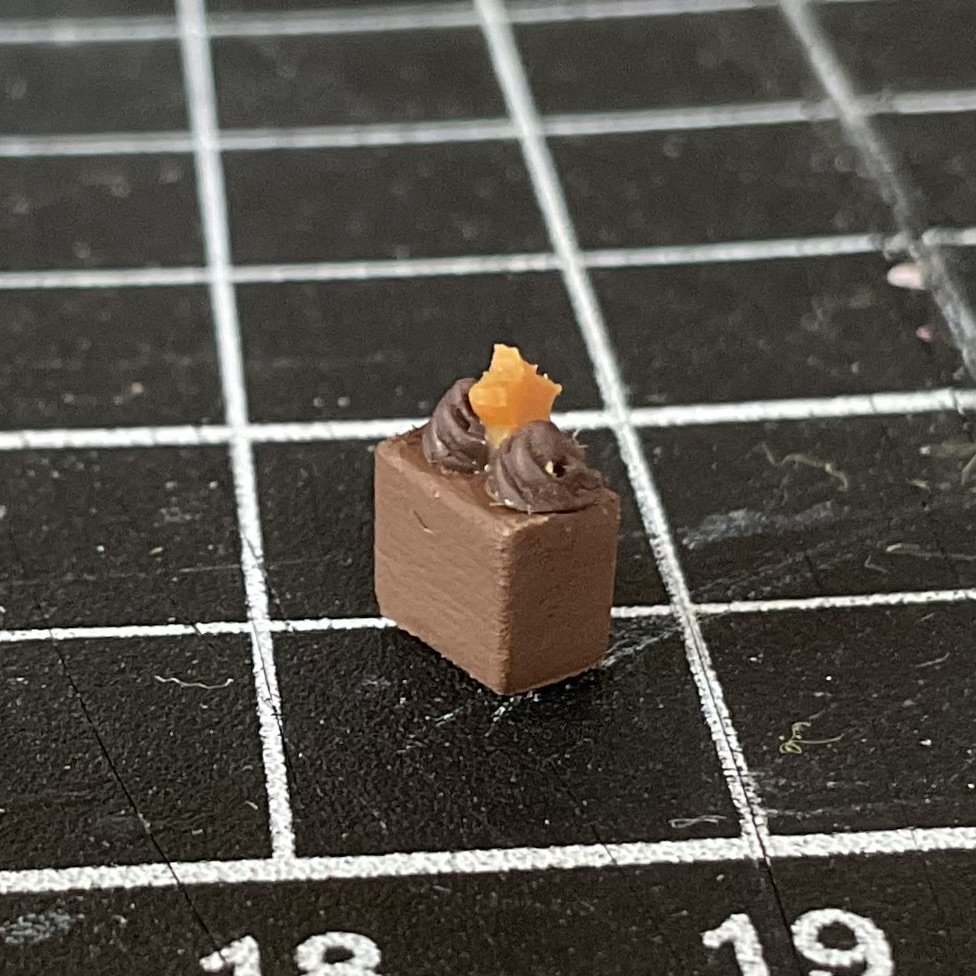
Brownies:
These were also made using wood shapes lightly sanded, with a few coats of chocolate brown paint. I made the chocolate ganache swirls using the brown Modena clay and the stars from ochre Modena clay. The decorations are glued onto the cake shape using tacky glue.
Bunny cake:
Paint a wooden shape with acrylic paint, sanding between coats, until a good, smooth surface is achieved. When dry, apply PVA type glue to sides and sprinkle craft sand over glue. Allow to dry. Make a bunny (or other) shape with clay and allow to dry. When dry, paint as desired, then glue to centre top of cake. I then glued tiny no-hole beads/nail caviar in a circle around the edge.

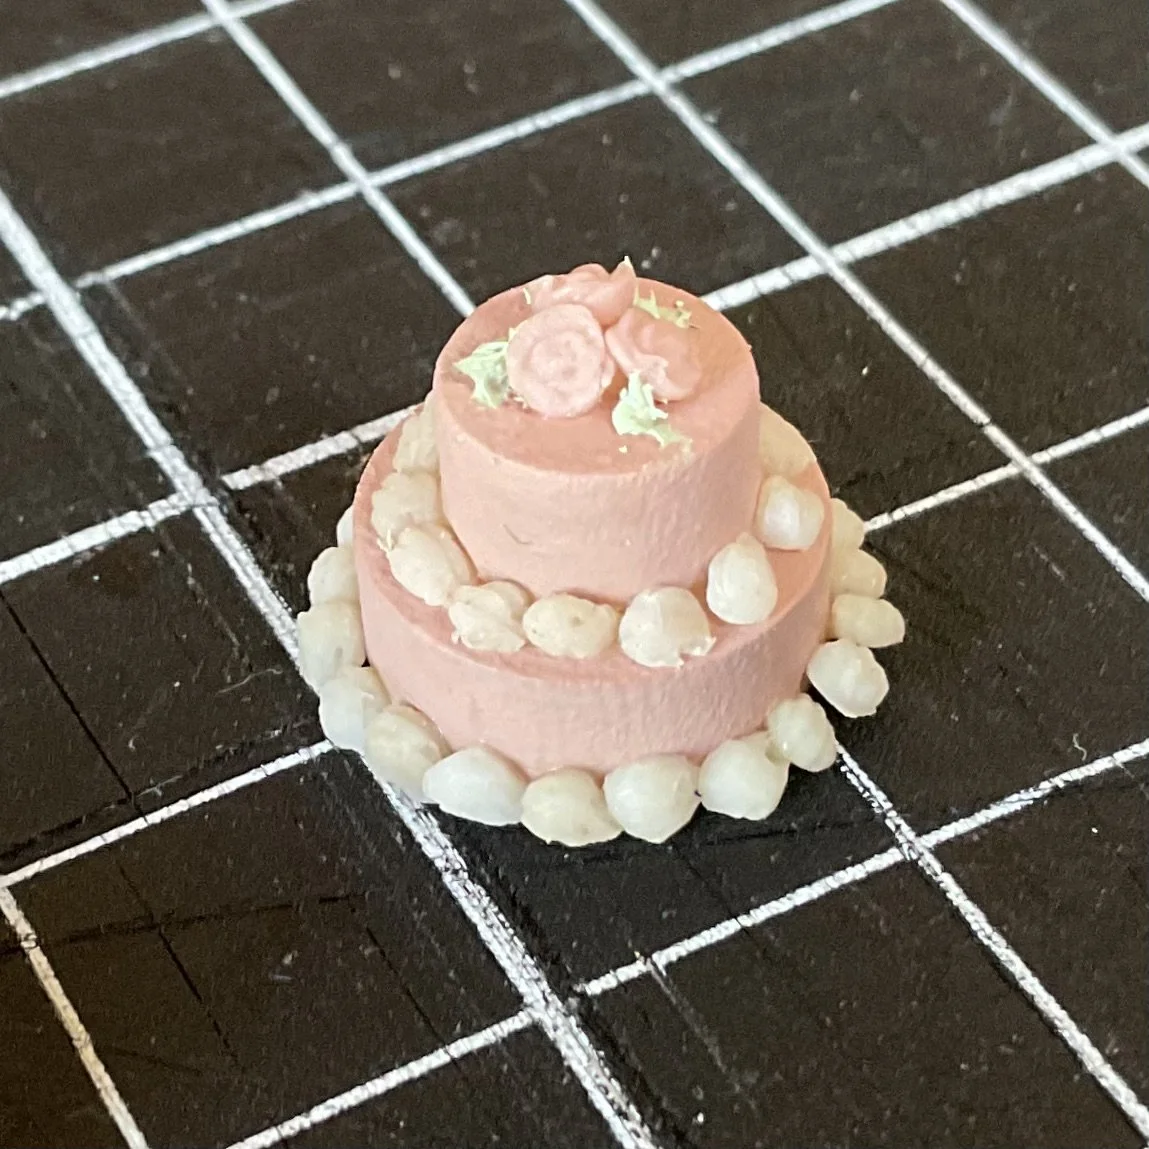
Tiered cake:
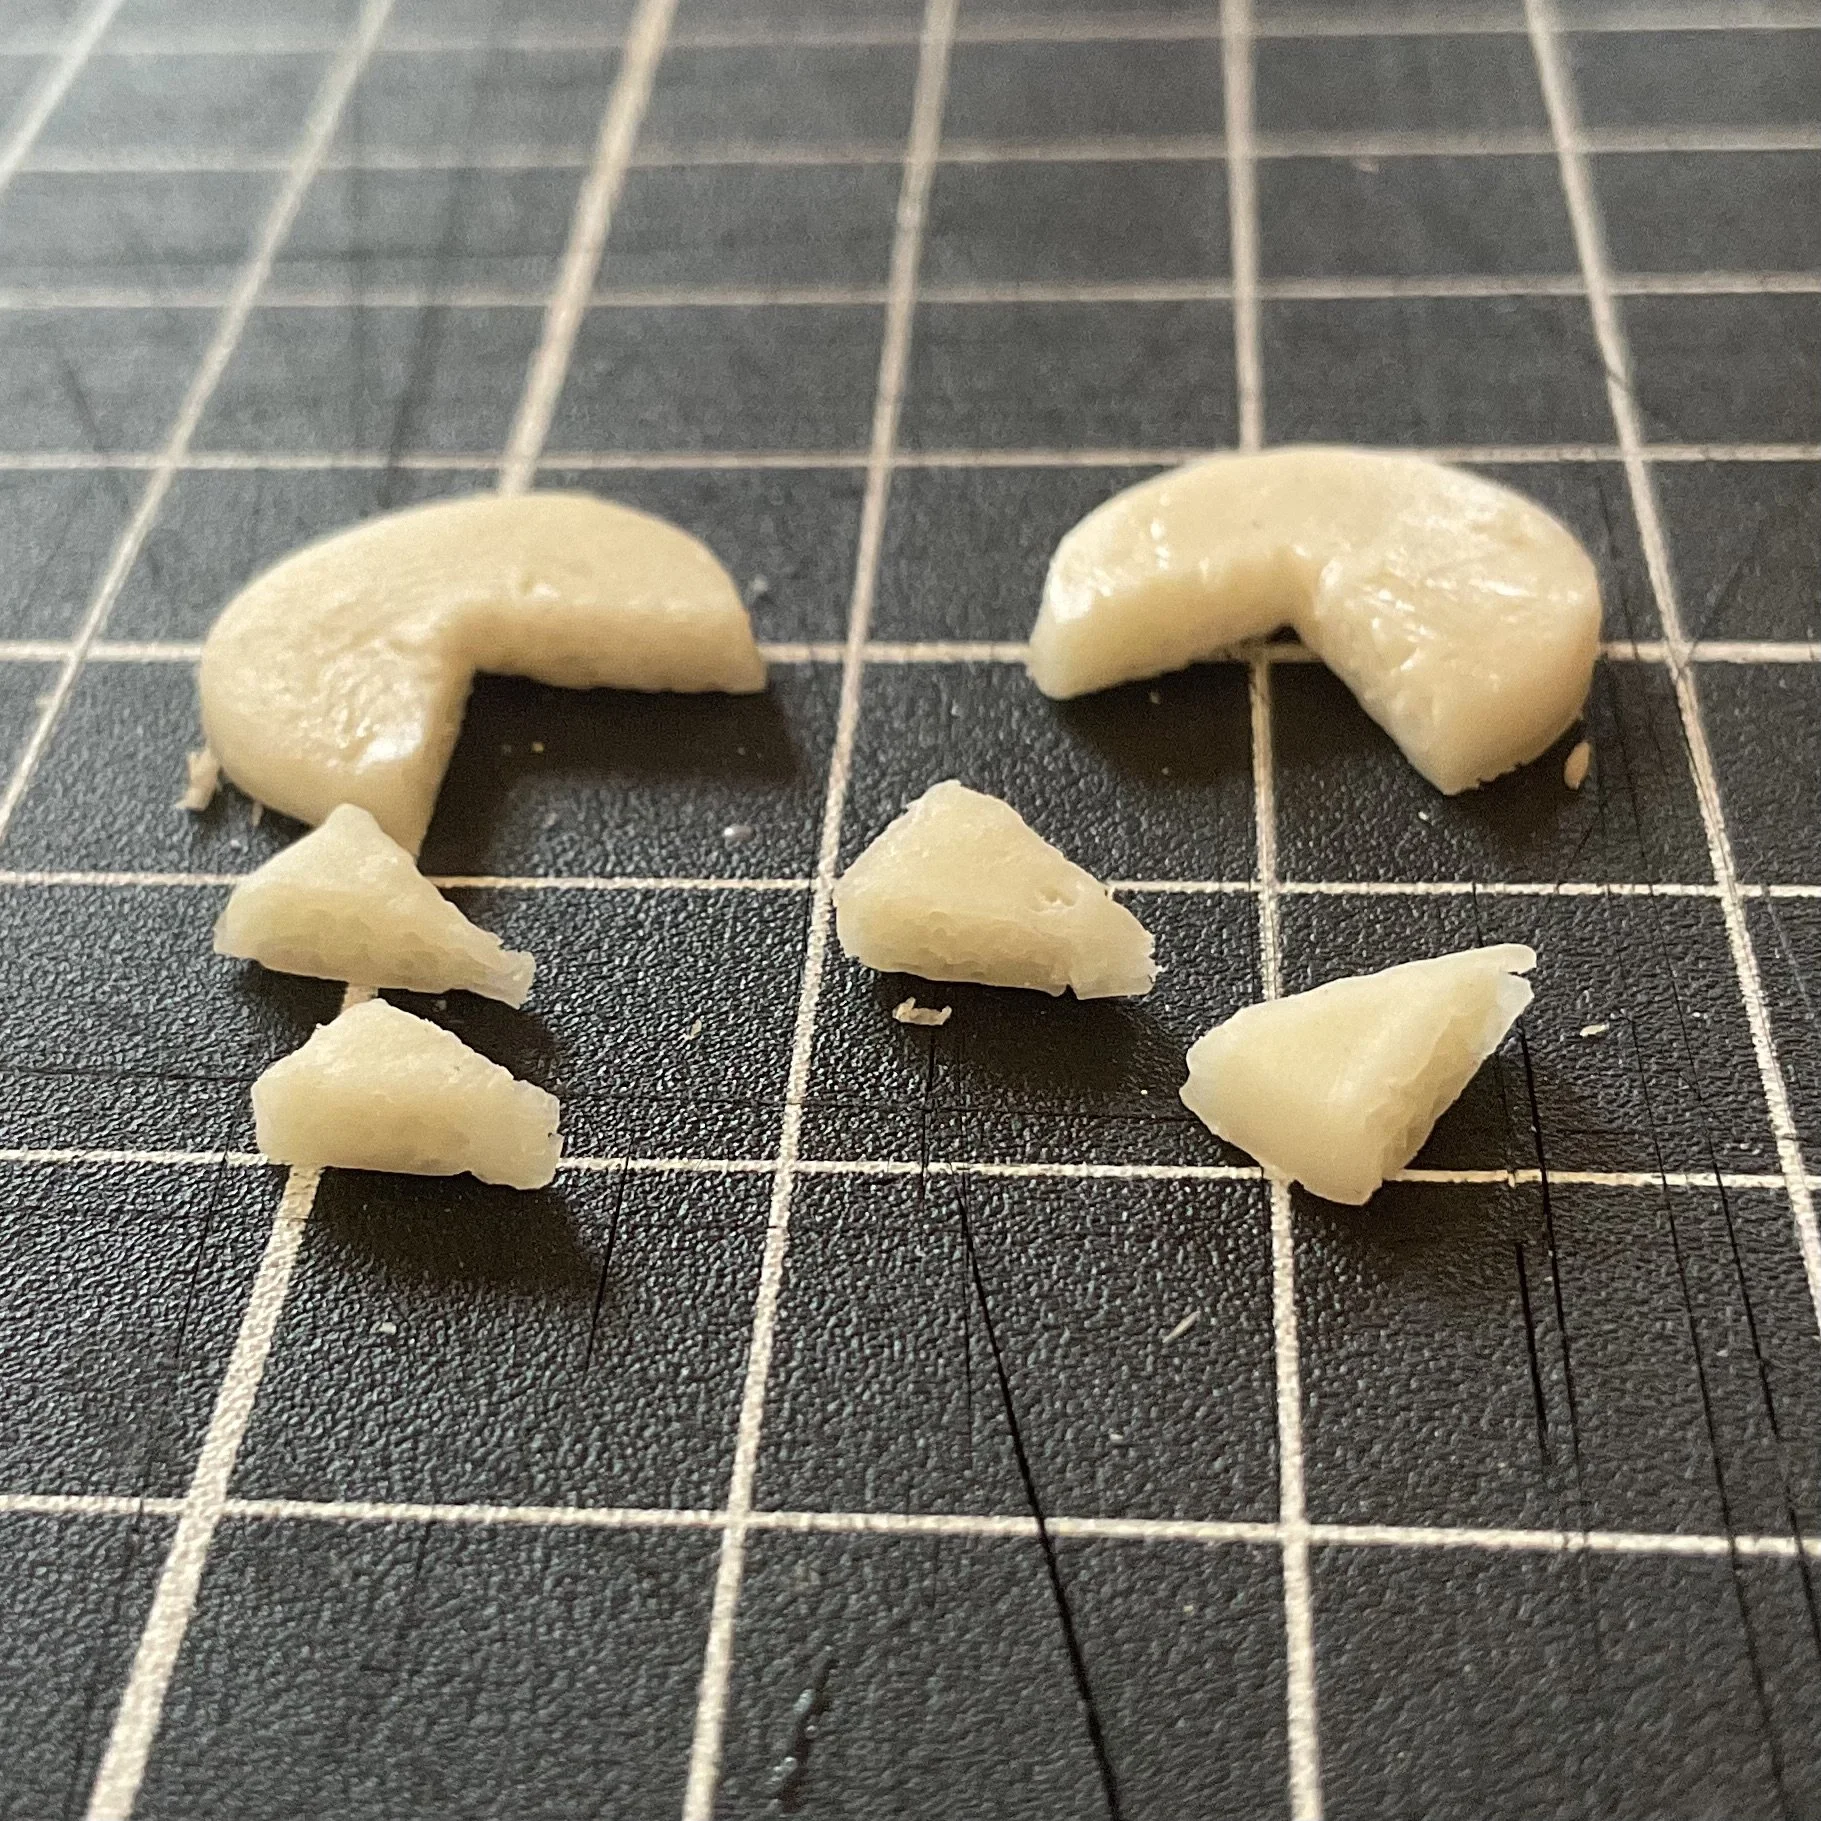
Paint wooden shapes as per bunny cake. Glue two or more shapes stacked and allow to dry. Pinch off tiny balls of white or cream clay and roll them into a ball then press into piped cream mould. Remove immediately (it should pop right out) and glue to bottom edge of cake. Overlap each cream piece just a little with the previous one. Repeat on upper tiers too if desired. Make tiny roses from pink clay using a mould and glue some to the top of the cake. Add tiny bits of green clay to look like leaves.