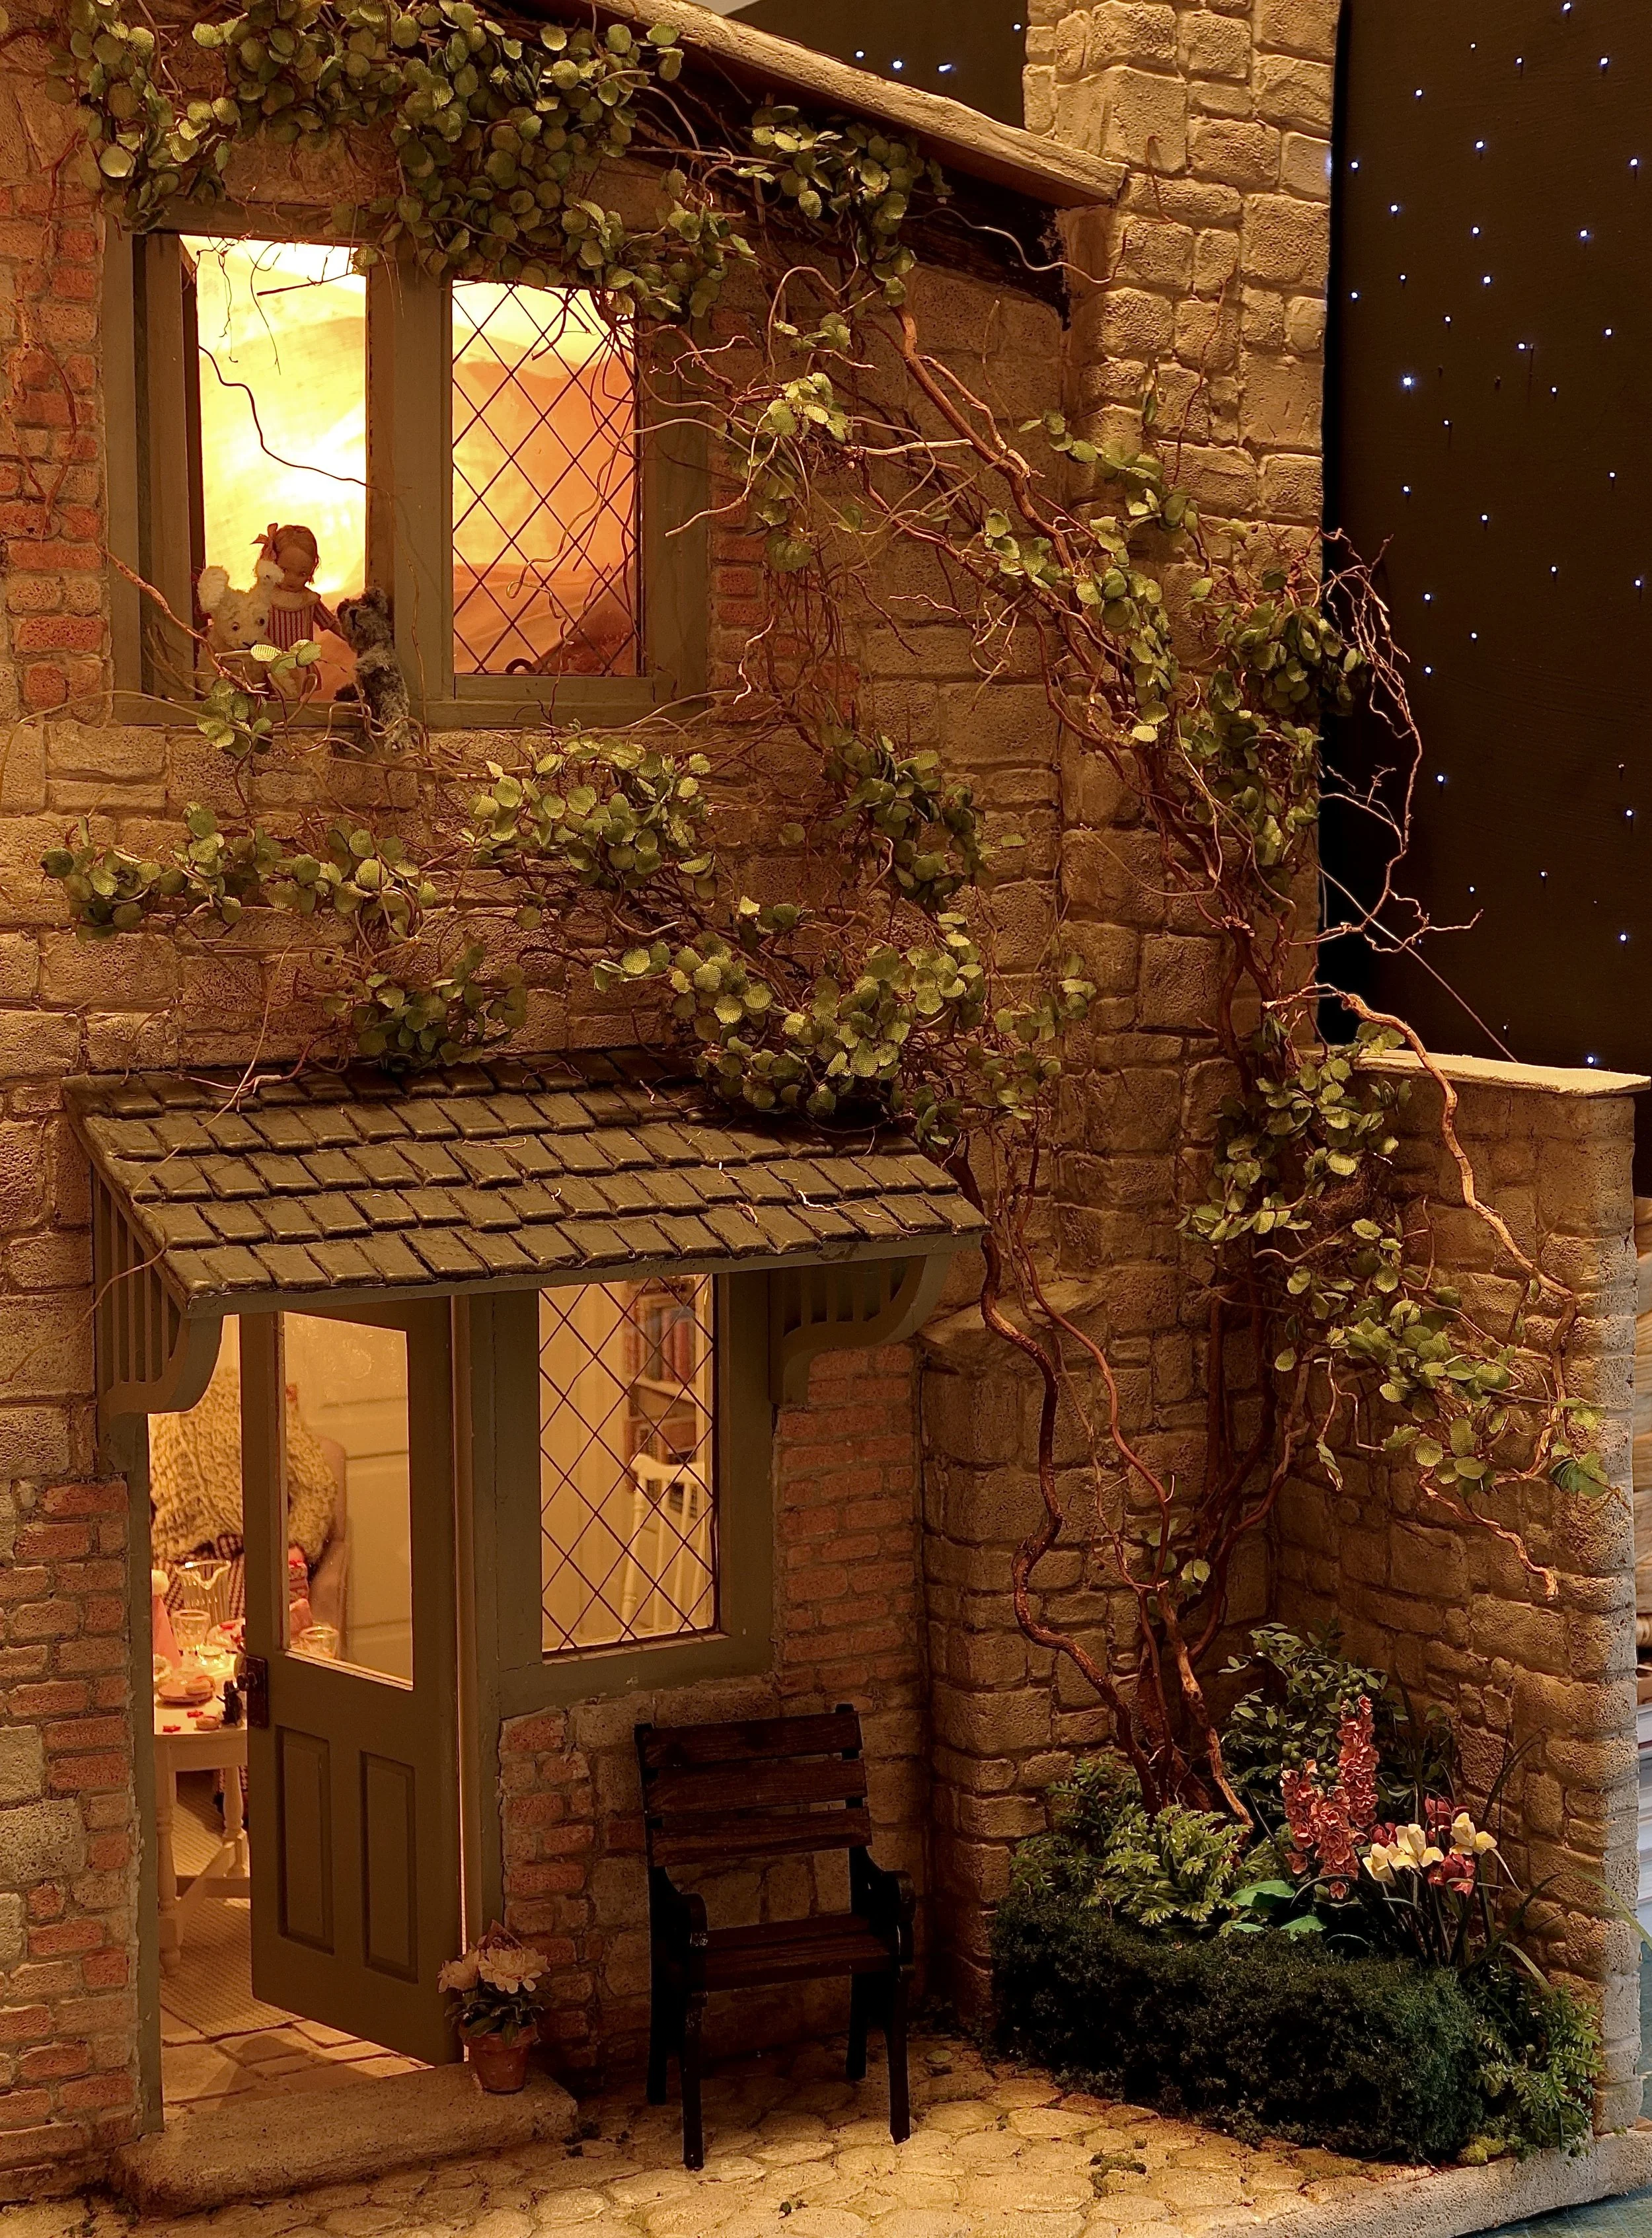
Twinkling fibre optic stars
The creative possibilities provided by LEDs is huge for miniaturists. A few years ago I made a roombox for a friend with a twinkling star-filled sky through windows at the back and ever since I have been wanting to use this technique for myself. When I entered the HBS/miniatures.com 2021 Creating Contest, I figured that was the perfect opportunity, as my scene was to be set at night-time, when the occupants had fallen asleep (intentionally or otherwise).
This is a fairly simple tutorial for a fairly simple project. I haven’t provided much guidance on connecting wires, but it is a pretty simple process too. I soldered my connections, and only needed to solder one set of wires together, but instead you could twist them well together and cover with heat shrink tube. Make sure your battery voltage is compatible with the LEDs you use.
I purchased my fibre optics and LEDs from here: https://www.ebay.ca/usr/me80?_trksid=p2047675.l2559. The seller is great and provided lots of information with my purchase, giving lots of ideas for other uses.
(My apologies for not having in-progress photos. Hopefully you get some idea of the set-up from the photo shown below.)
Tools:
Tiny drill bit to fit the size of your fibre optics
Pin vise or Dremel
Paint brush
Soldering stuff (to join wires of the LEDs to battery pack, but you could also twist wires together and cover with heat shrink tube instead)
Supplies:
Board for your sky (I used MDF)
Black paint (I used a matte spray paint)
Glue (I used a strong PVA type glue - make sure it won’t melt your optic fibres)
Scissors
Optic fibre, small gauge
Flickering LED kit (I used white)
Battery pack (with or without switch)
Heat shrink tube
Battery to suit your LEDs and battery pack
Masking tape
Paint your board with the black paint. Get a good even coat, then allow to dry. Repeat as needed.
Drill tiny holes in the board, preferably from front to back. Make them randomly spaced. You are replicating stars, so don’t make it a uniform pattern.
Now for the fibres. You will need to consider length - they will all need to be gathered from each hole to one point for attachment to the LED and battery pack. They are not super flexible, so keep this in mind as you cut. I poked the fibre into a hole from the back of the board, stuck a blob of glue on the back where the fibre met the board and cut to length with a little extra to ensure it would reach the battery pack. You can have the fibre ends on the front side flush with the board or have some poking out a little further. I made mine flush. Apparently having them uneven on the front will add extra variation in your twinkling.
When the glue has dried, gently pull all your fibres to where you will locate the battery pack. Bunch them all together with a little masking tape to hold them. When you are sure all the fibres are well bundled and held firmly together with tape, cut the excess off the fibres (this leaves you with a little clump of fibres like a little pony tail).
Attach your flickering LED to your battery pack. You can solder the ends of the wires together, or twist the ends of the wires together, and cover with heat shrink tube. Make sure you connect red wires with red wires and black wires with black wires! Otherwise you will be in all sorts of trouble.
The LED set I bought had a little tube around the LEDs. If you have one of these, you can poke the fibres into the tube then wrap more tape around the tube and fibres to hold them in there. Otherwise, just butt the fibres up to the LED and wrap it all together with tape. Make sure though that the ends of the fibres are facing right at the LED - the light travels through the fibre like water through a tube.
Attach your battery and switch your little flickering stars on! You probably want to secure your battery pack and LED assembly to your board so that the fibres don’t get pulled out and messed up. And be careful the fibres don’t catch on things if you move your creation around.
I hope you have a little fun with this tutorial! I’d love to see what you do with this.
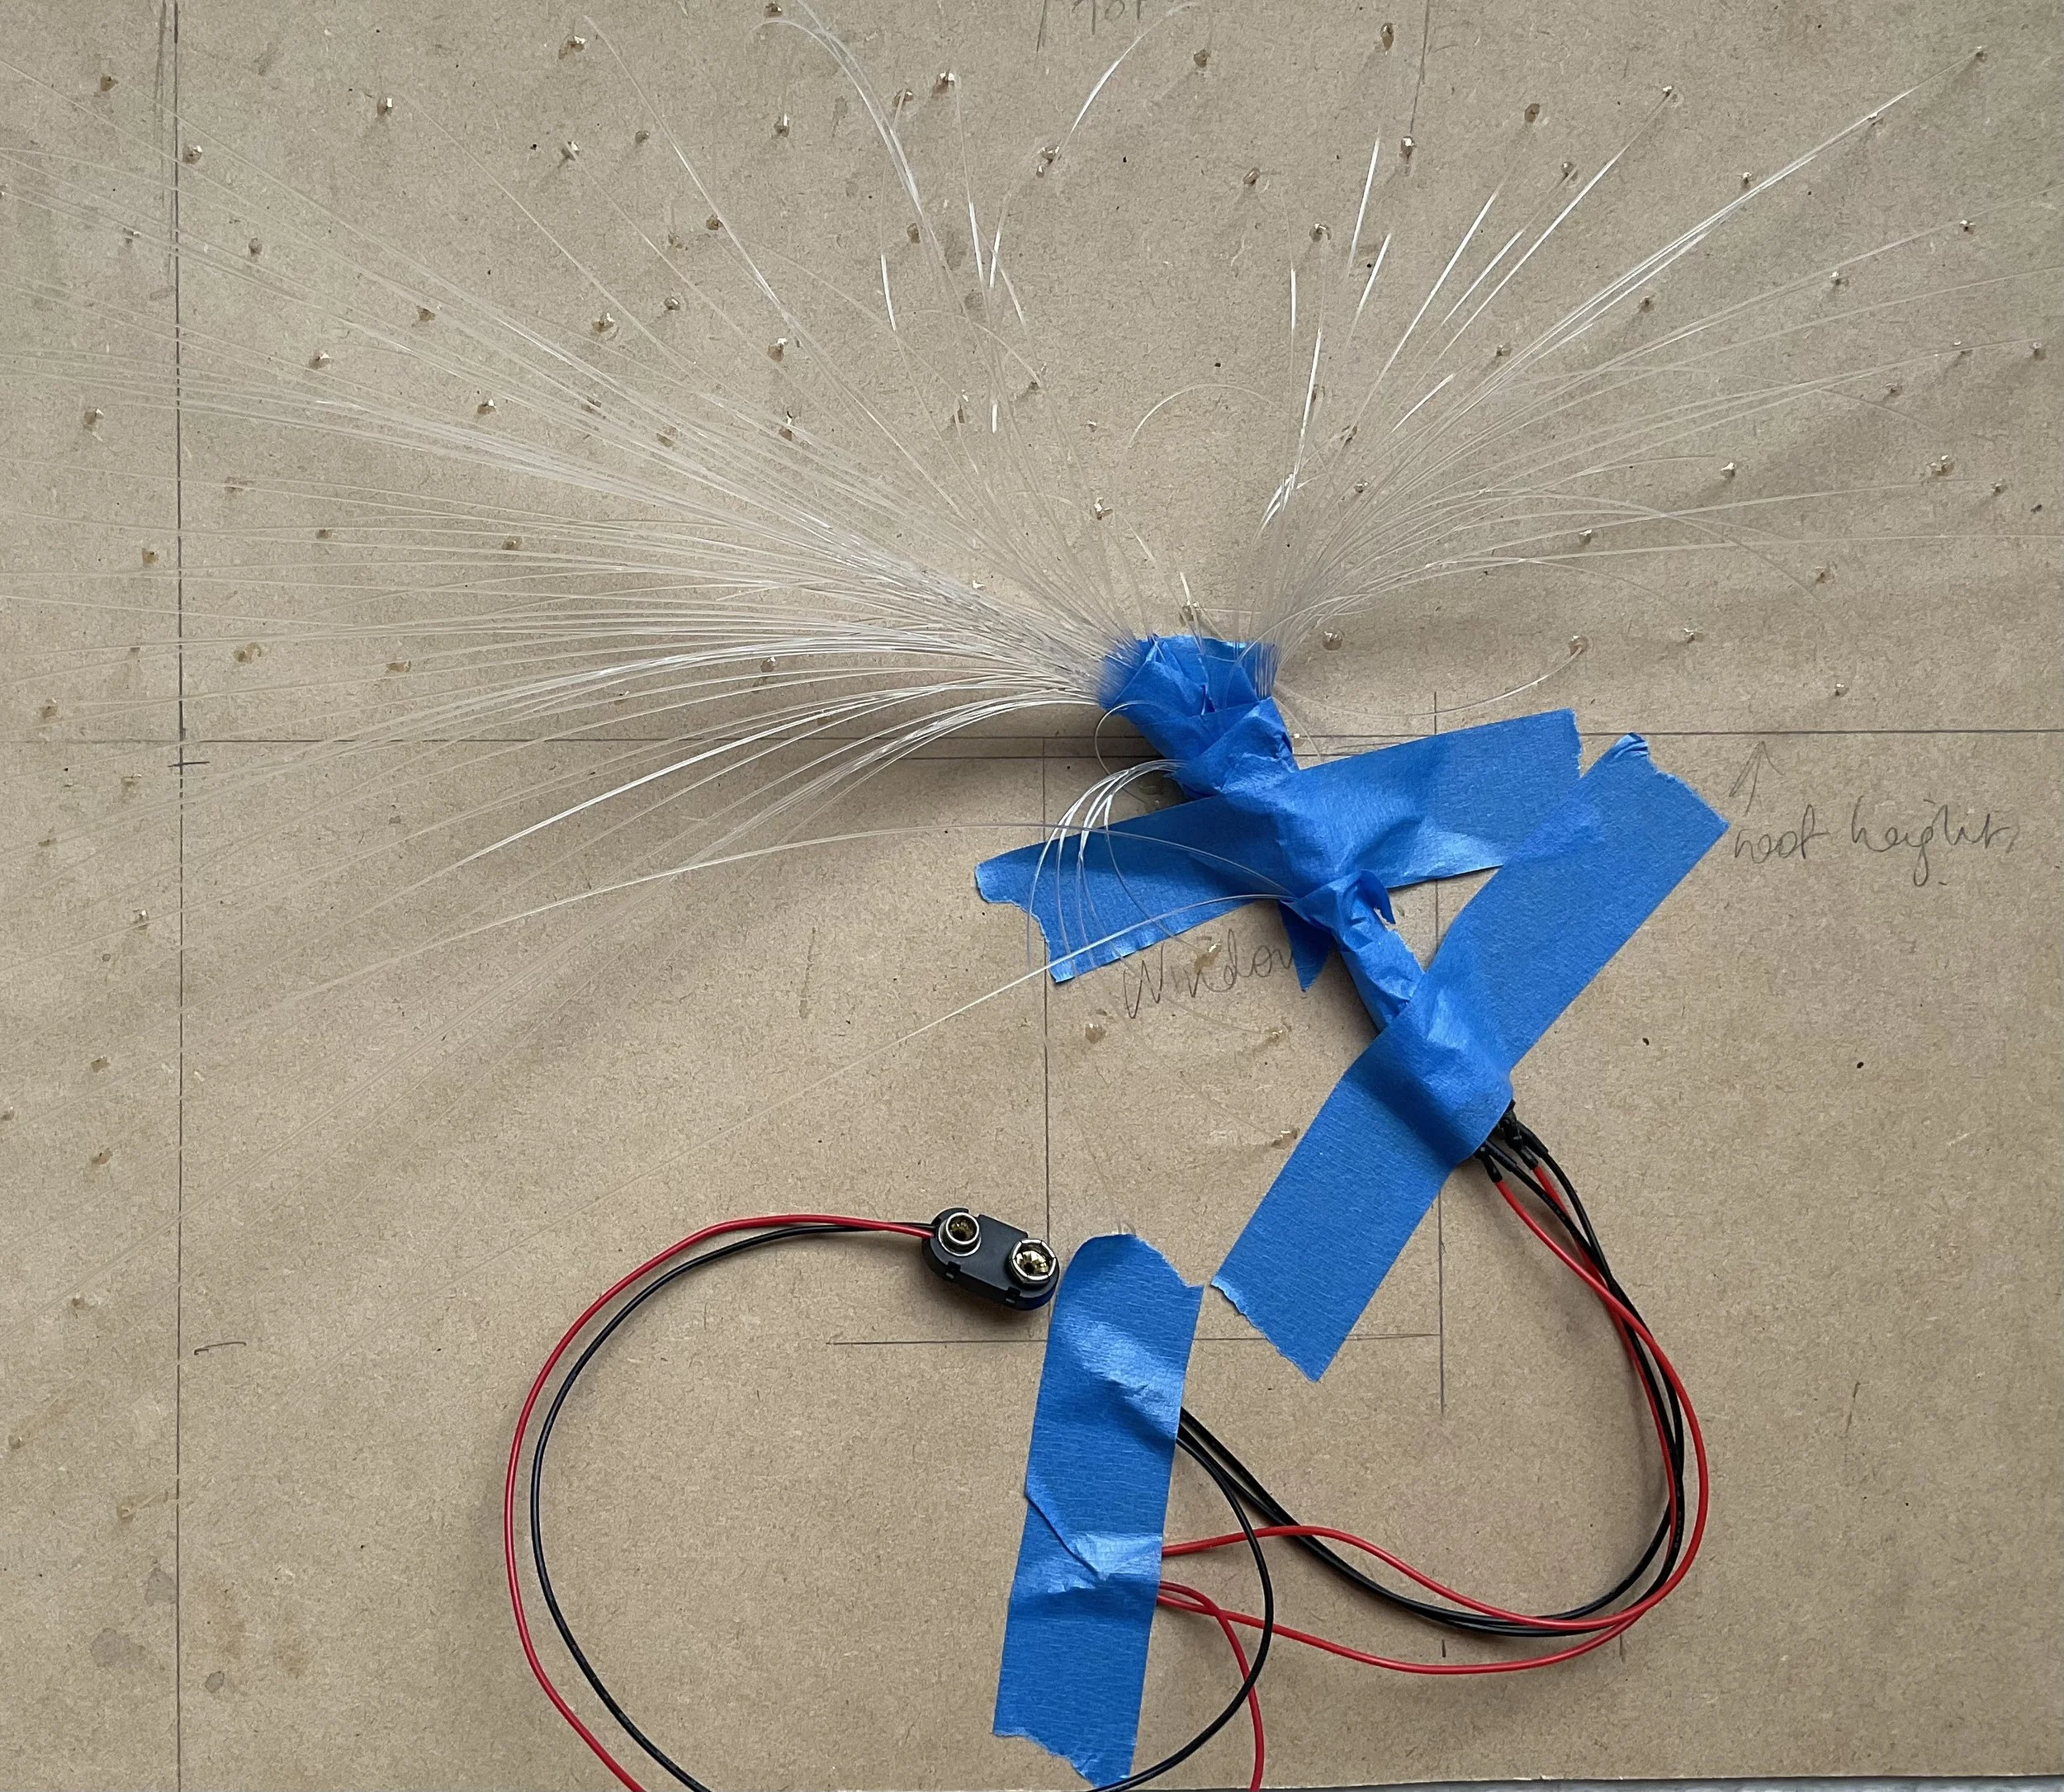
The back side of the night sky. Fibres are gathered together and taped to the LEDs (you can see where the LED wires are poking out under the tape on the right). The LED wires are soldered together with the battery pack wires under the tape at bottom.
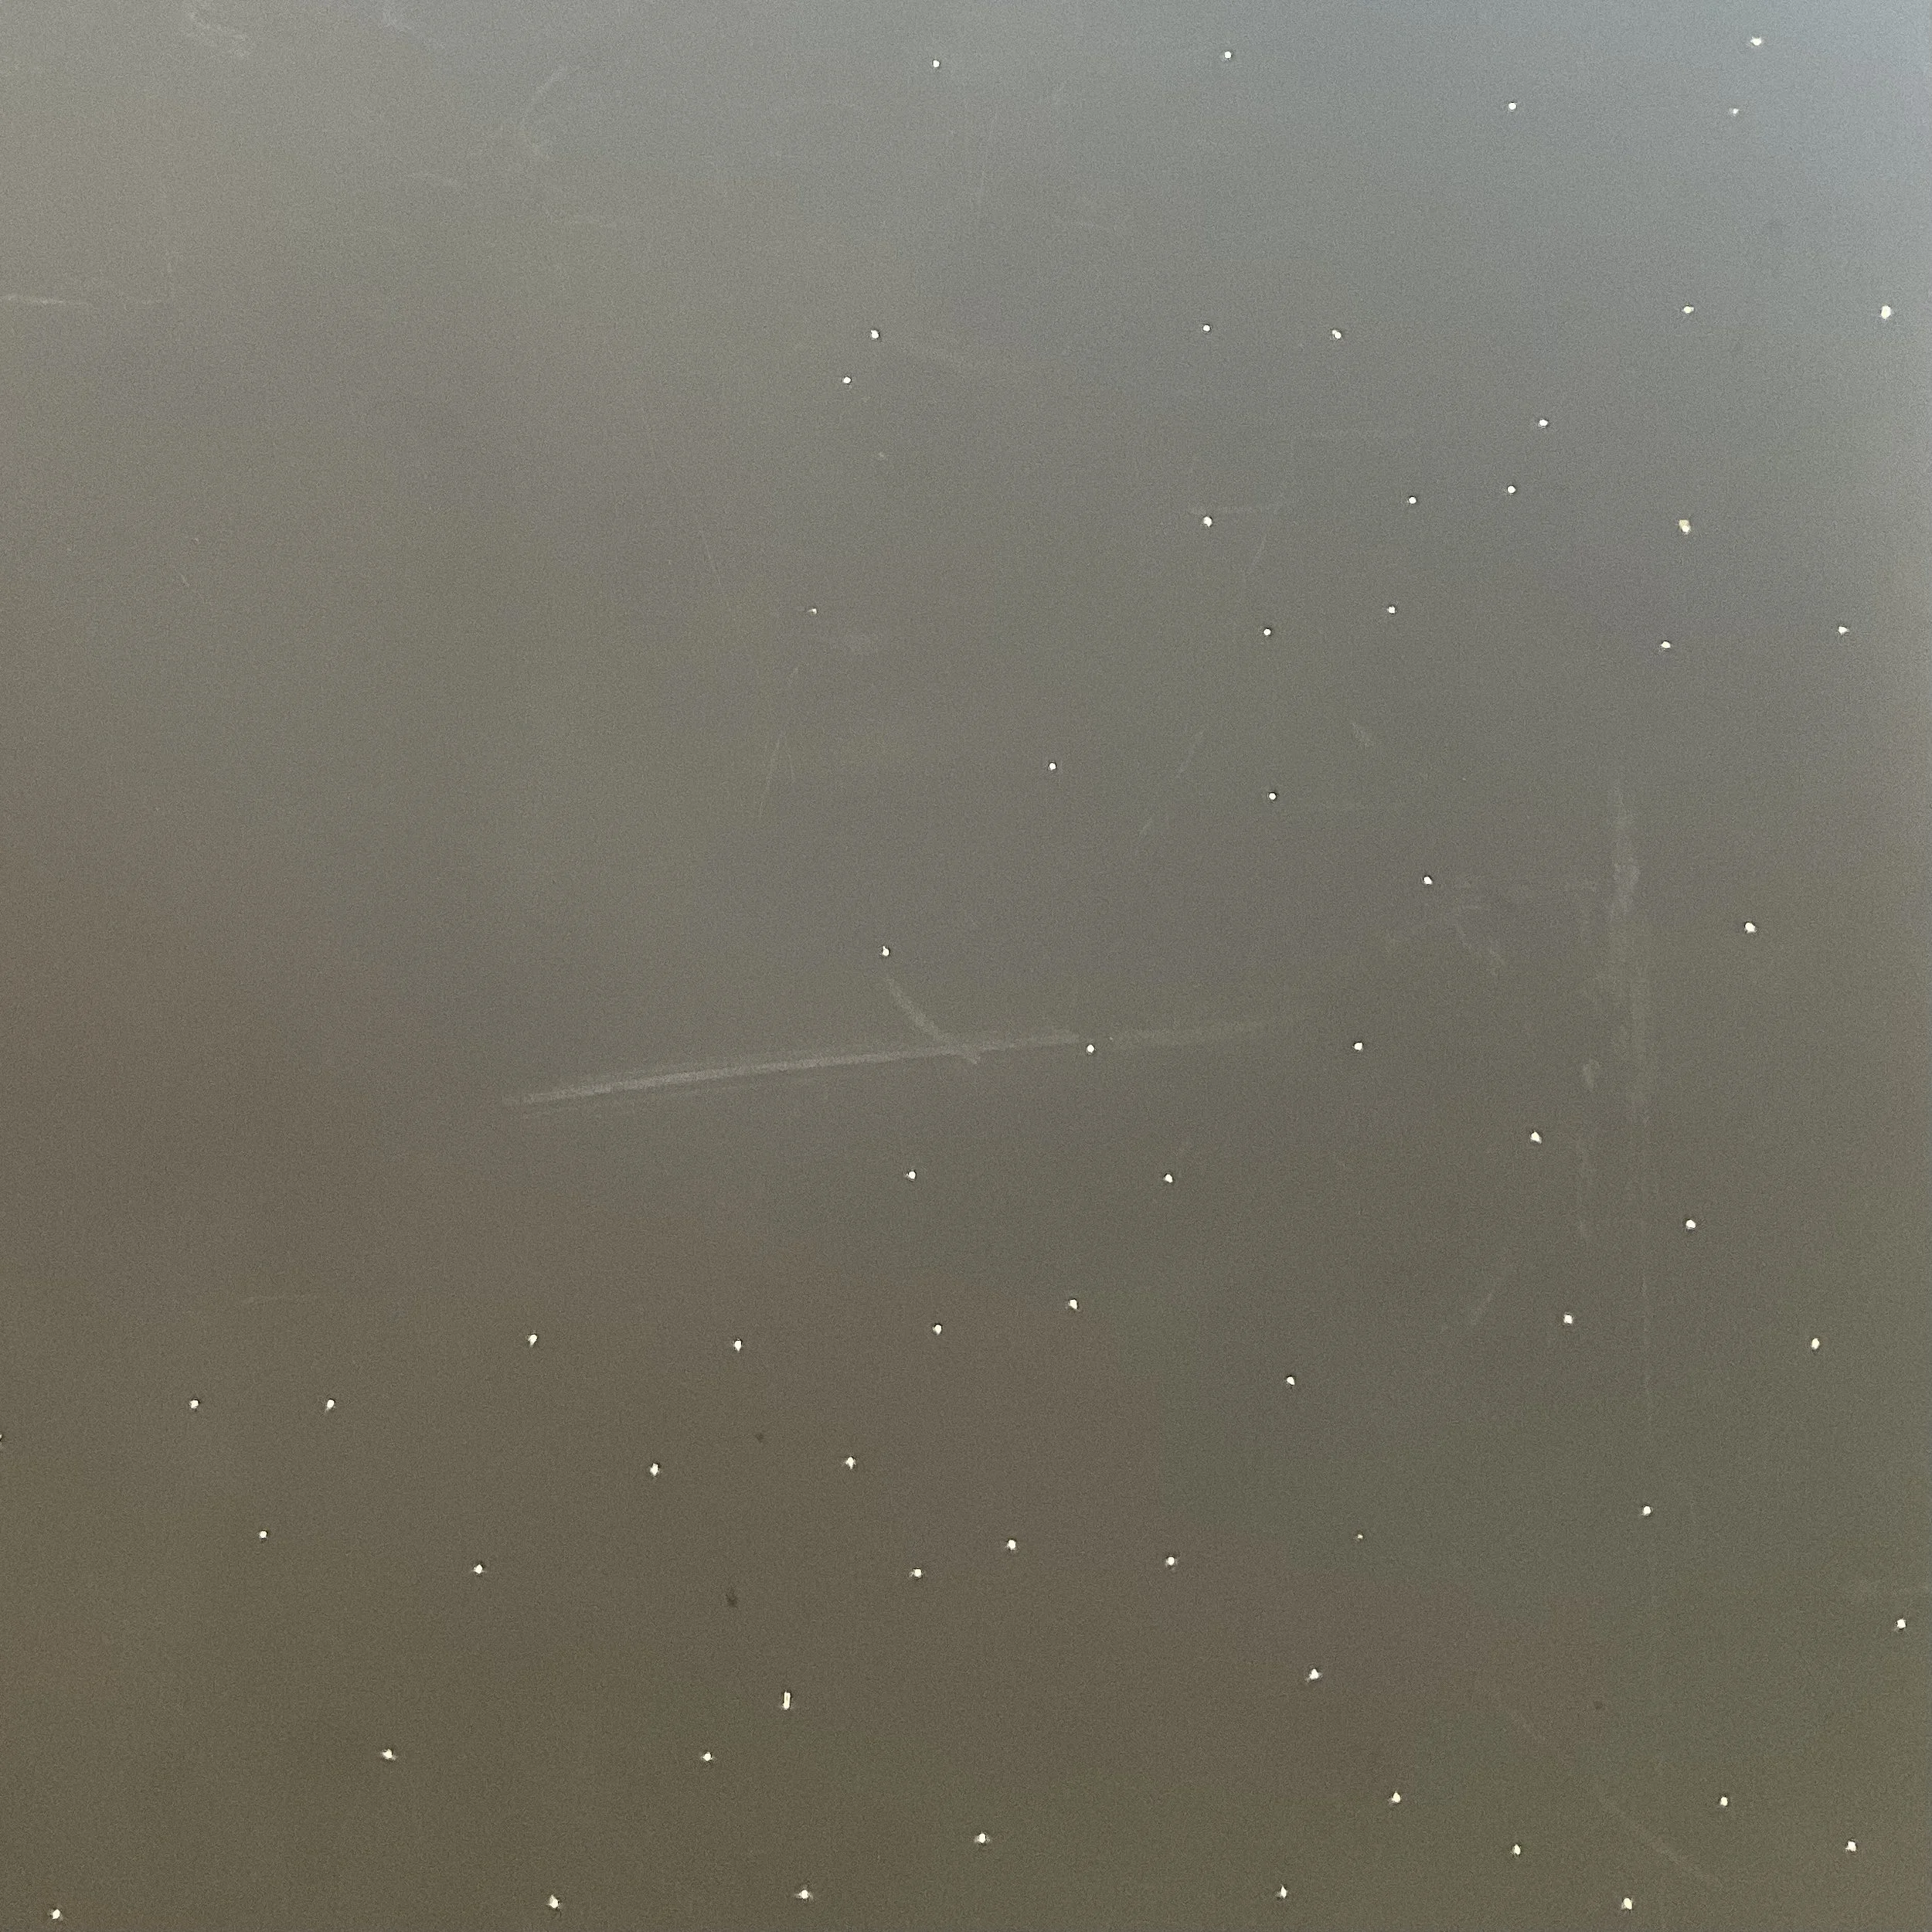
This is the front side of the night sky showing some of the stars. It is almost black rather than the grey it appears. This was just held up to the light (without the LEDs turned on) so you can see how much light travels through the fibres.